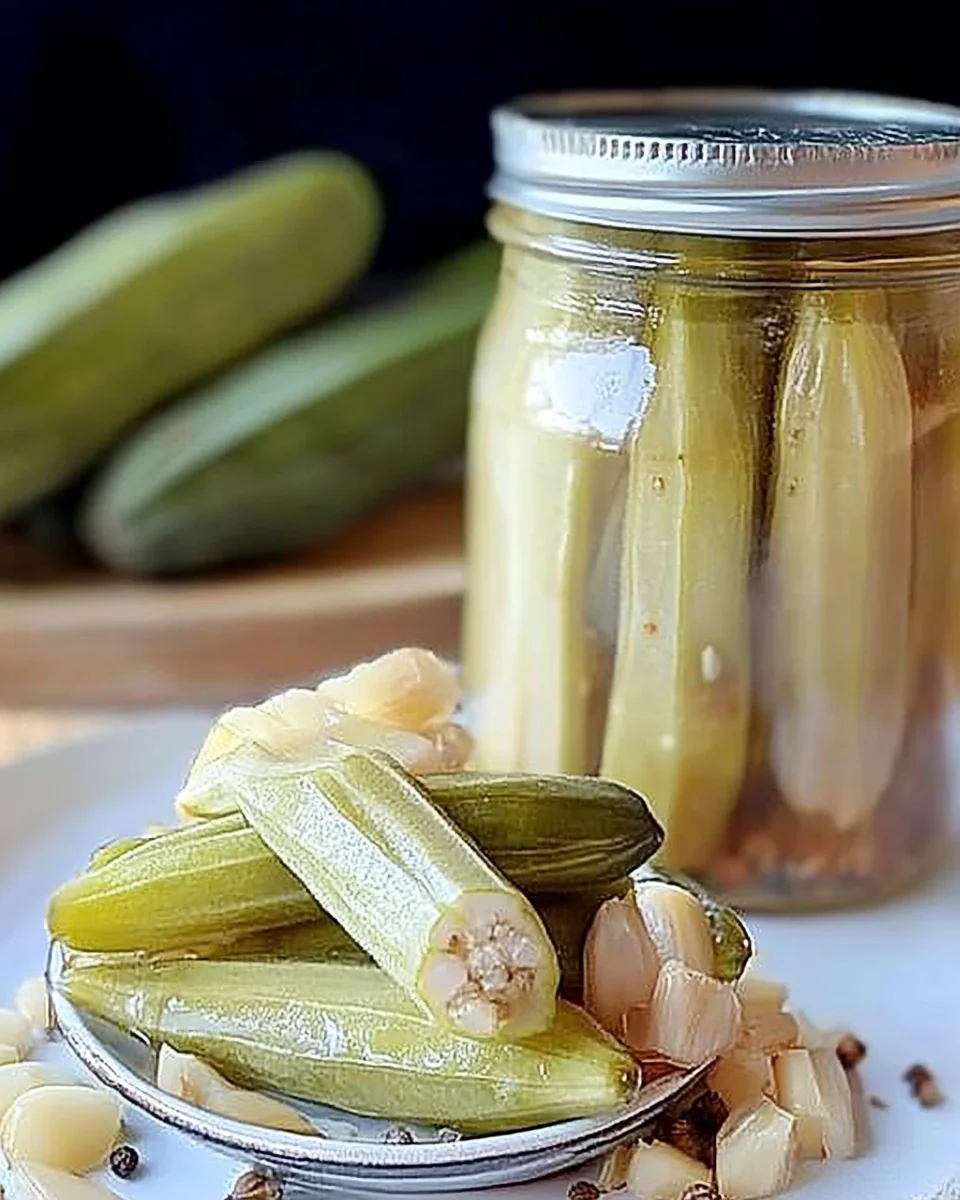
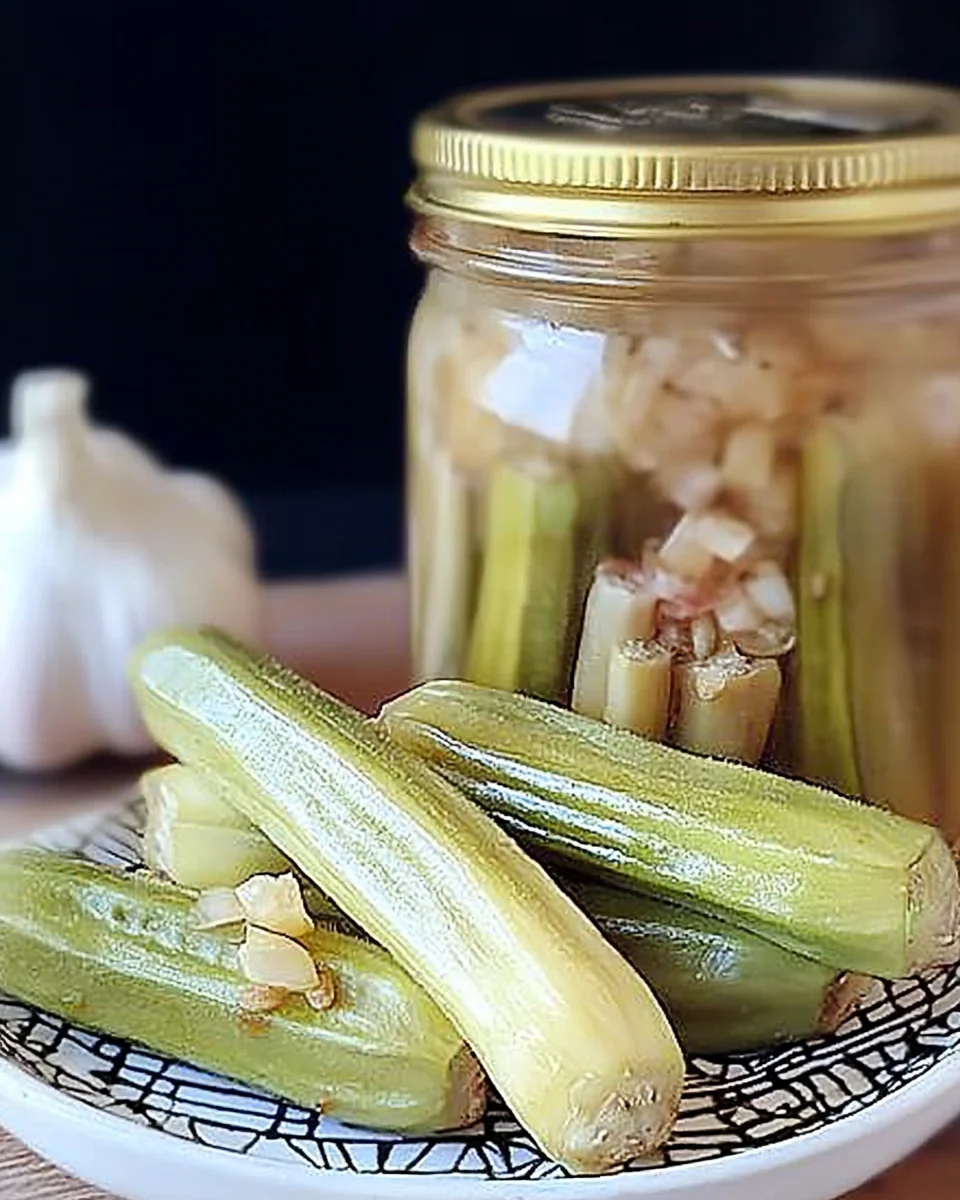
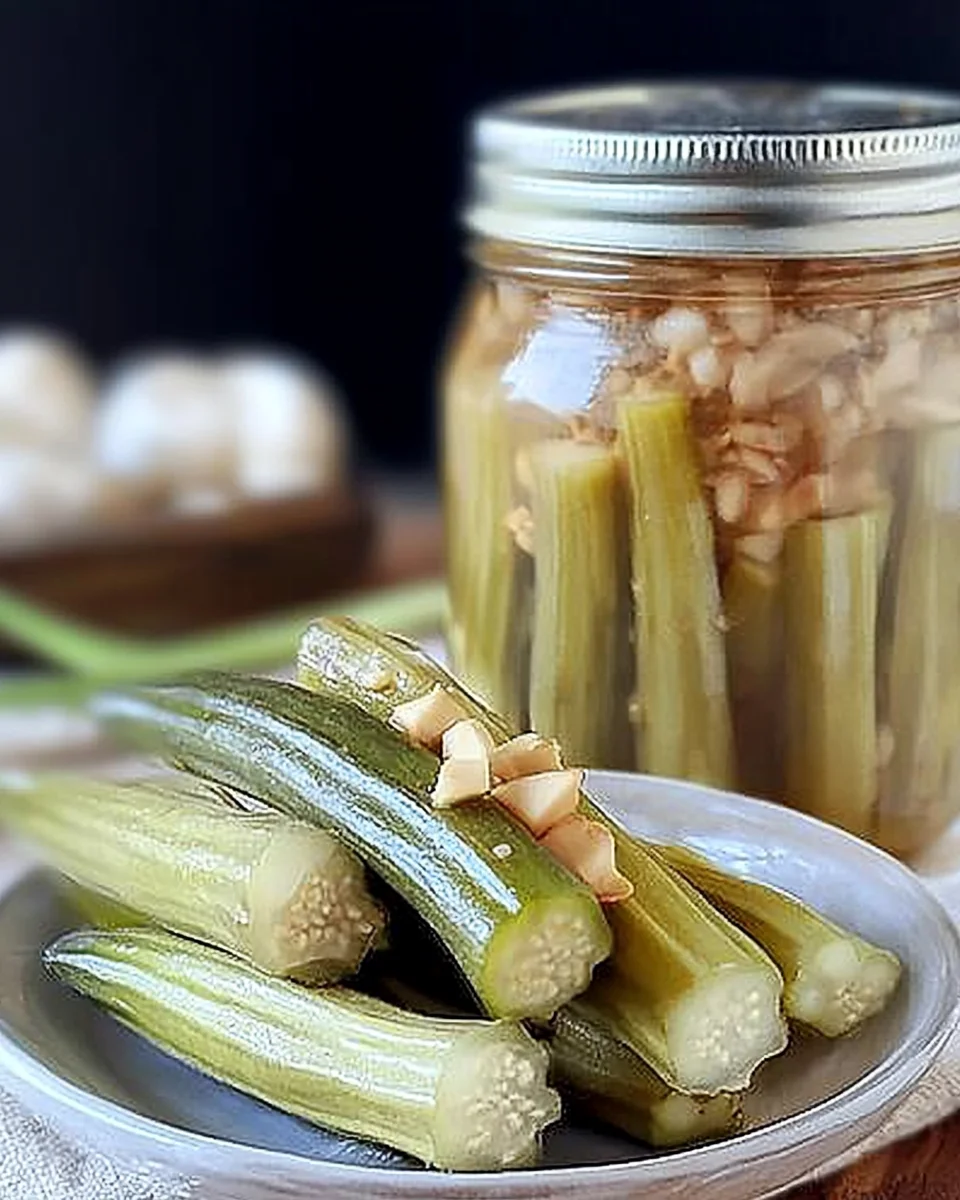
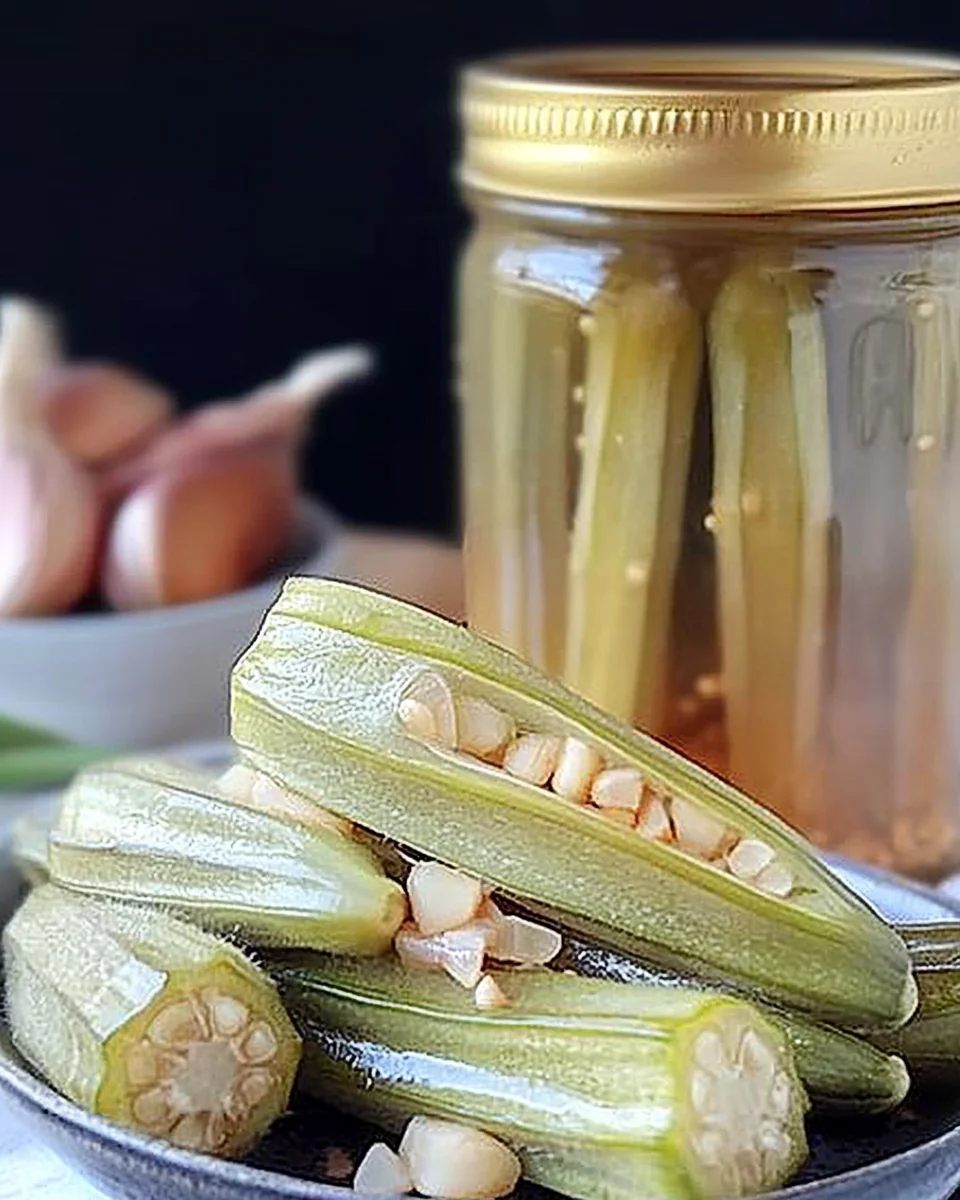
Garlic-Dill Pickled Okra (crunchy, not slimy probiotic snack!)
I used to think okra was slimy. That all changed the day I met Garlic-Dill Pickled Okra (crunchy, not slimy probiotic snack!)! This delightful treat is perfect for picnics, parties, or as a crunchy snack at home. Unlike traditional pickles, this recipe brings out the vibrant flavor of fresh okra while providing gut-friendly probiotics. You’ll love how easy it is to prepare and how versatile it can be in your meals.
Why You’ll Love This Recipe
- Quick to Make: This recipe comes together easily with minimal prep time.
- Crispy Texture: Enjoy your pickles without the dreaded slime that often comes with okra.
- Healthy Benefits: Packed with probiotics, these pickles support gut health and stabilize blood sugar.
- Versatile Snack: Serve them as a side dish, on a cheese board, or simply munch on them straight from the jar!
- Customizable Flavors: Adjust the spices based on your taste preferences for a personal touch.
Tools and Preparation
Before diving into the pickling process, gather your tools. Having everything ready makes the preparation smoother.
Essential Tools and Equipment
- Mason jar
- Fermenting weights
- Fermenting lid
- Mixing bowl
- Measuring spoons
Importance of Each Tool
- Mason jar: Essential for holding your okra during fermentation; make sure it’s clean for optimal results.
- Fermenting weights: Keeps the okra submerged in brine for consistent fermentation.
- Fermenting lid: Allows gases to escape while preventing contaminants from entering.
Ingredients
For the Brine
- 1 cup pure water
- 2 teaspoons sea salt
For Flavoring
- 1 teaspoon dried dill seed
- 1/2 teaspoon mustard seed
- 1/2 teaspoon whole black peppercorns
For Pickling
- 12 to 16 fresh okra pods (washed and tops trimmed)
- 2 cloves garlic (thinly sliced)
- 1/4 cup onion (sliced or in chunks)
For Garnish
- 2 tablespoons fresh parsley, finely chopped
How to Make Garlic-Dill Pickled Okra (crunchy, not slimy probiotic snack!)
Step 1: Prepare the Okra
Wash okra pods thoroughly and trim the tops without cutting them off completely. This helps maintain their crunchiness during fermentation.
Step 2: Mix the Brine
In a mixing bowl, dissolve sea salt in pure water. Set aside once fully dissolved.
Step 3: Add Spices
Place dried dill seed, mustard seed, and whole black peppercorns at the bottom of your Mason jar.
Step 4: Pack the Jar
Carefully pack the okra vertically into the Mason jar, ensuring they fit snugly but not too tightly.
Step 5: Layer with Garlic and Onion
Stuff thinly sliced garlic cloves and onion pieces throughout the okra in the jar for added flavor.
Step 6: Pour in Brine
Pour the prepared brine into the jar over the packed okra. Leave some space at the top for fermenting weights.
Step 7: Weigh Down
Place fermenting weights on top of the okra and press down gently to keep them submerged in brine.
Step 8: Seal It Up
Affix your fermenting lid securely onto the Mason jar to allow fermentation gases to escape while keeping contaminants out.
Step 9: Let It Ferment
Leave the jar at room temperature on your counter for about 3 to 10 days. Taste daily until you reach your desired level of fermentation.
Step 10: Replace Lid
Once fermented, remove weights and switch out the fermenting lid with a regular lid for storage.
Step 11: Age Your Pickles
Refrigerate your pickled okra to let them age for a few more days (or weeks) if desired. Enjoy chilled – they stay crunchy for several weeks!
How to Serve Garlic-Dill Pickled Okra (crunchy, not slimy probiotic snack!)
Garlic-dill pickled okra is a versatile and flavorful snack that can complement various meals. Whether you’re hosting a gathering or simply enjoying a quiet evening at home, here are some delicious ways to serve this crunchy treat.
As a Snack
- Enjoy them straight from the jar for a quick and healthy nibble.
- Pair with cheese and crackers for a delightful appetizer platter.
In Salads
- Toss chopped pickled okra into green salads for an extra crunch.
- Add to potato salad for a tangy twist that elevates the dish.
With Dips
- Serve alongside hummus or tzatziki for a refreshing contrast.
- Use them as a garnish atop creamy dips for added flavor and color.
On Charcuterie Boards
- Place pickled okra alongside cured meats and artisan cheeses.
- Add to your board with olives, nuts, and dried fruits for variety.
As a Garnish
- Top tacos or burritos with slices of pickled okra for extra zest.
- Use as a garnish in cocktails like Bloody Marys for an impressive touch.
How to Perfect Garlic-Dill Pickled Okra (crunchy, not slimy probiotic snack!)
Making garlic-dill pickled okra is simple, but perfecting the process can enhance your results. Here are some tips to ensure your pickles turn out just right.
- Choose fresh okra: Select firm, vibrant pods without blemishes. Freshness impacts both texture and flavor.
- Adjust seasoning: Feel free to tweak spices according to your taste. More dill or garlic can amplify flavor.
- Monitor fermentation: Keep an eye on your jar during fermentation; taste it daily to find your preferred tanginess.
- Use filtered water: Avoid tap water with chlorine, which can hinder fermentation. Filtered water leads to better results.
- Store properly: Once opened, keep your pickles refrigerated in an airtight container to maintain their crunchiness.
- Experiment with flavors: Try adding other spices like red pepper flakes or bay leaves for unique variations.
Best Side Dishes for Garlic-Dill Pickled Okra (crunchy, not slimy probiotic snack!)
Garlic-dill pickled okra pairs wonderfully with many side dishes. Adding these options will create a well-rounded meal that highlights the flavors of your crunchy snack.
- Coleslaw: A crisp and creamy coleslaw adds texture and balances the tartness of the pickles.
- Cornbread: Sweet cornbread complements the savory notes of pickled okra beautifully.
- Grilled Vegetables: Seasoned grilled vegetables offer smokiness that contrasts nicely with the acidity of the okra.
- Fried Chicken: The crispy coating on fried chicken pairs well with the crunchy, tangy pickles as a refreshing side.
- Potato Wedges: Baked or fried potato wedges provide heartiness while enhancing the overall meal experience.
- Macaroni Salad: A creamy macaroni salad creates a satisfying contrast to the zesty flavors of garlic-dill pickled okra.
- Ranch Beans: Hearty ranch beans add protein and round out your plate nicely while complementing the crunch of the okra.
- Cucumber Salad: A light cucumber salad refreshes the palate, making it an ideal addition next to pickles.
Common Mistakes to Avoid
When making Garlic-Dill Pickled Okra, it’s essential to avoid common pitfalls that can affect flavor and texture. Here are some mistakes to keep in mind:
-
Skipping the salt: Salt is crucial for fermentation. It helps maintain the okra’s crunchiness and flavor. Always ensure you dissolve the right amount of salt in your brine.
-
Using old or bruised okra: Freshness matters! Old or damaged okra can lead to a slimy texture. Choose firm, bright green pods for the best results.
-
Not packing tightly enough: If you don’t pack the okra tightly into the jar, they may float and become exposed to air, leading to spoilage. Make sure to pack them vertically and snugly.
-
Ignoring fermentation time: Each environment is different, impacting how long it takes for fermentation. Taste your pickles daily after three days to find your preferred level of tanginess.
-
Forgetting about storage conditions: After fermenting, transferring your pickles to the refrigerator is vital for slowing down the fermentation process. This helps maintain their freshness and crunch.
Refrigerator Storage
- Store Garlic-Dill Pickled Okra in an airtight container in the fridge.
- They can last for 3-4 weeks when properly stored.
- Use glass jars for best results, as they won’t retain odors or stains.
Freezing Garlic-Dill Pickled Okra (crunchy, not slimy probiotic snack!)
- Freezing is not recommended for this recipe as it may change texture.
- If you must freeze, use freezer-safe containers for short-term storage.
- Consume within 2 months if frozen; thaw in the refrigerator before serving.
Reheating Garlic-Dill Pickled Okra (crunchy, not slimy probiotic snack!)
-
Oven: Preheat to 375°F (190°C) and warm in a dish covered with foil for about 10 minutes.
-
Microwave: Place in a microwave-safe container and heat on medium power for 1-2 minutes, stirring halfway through.
-
Stovetop: Heat over medium-low heat in a skillet until warmed through, usually taking about 5 minutes.
Frequently Asked Questions
What is Garlic-Dill Pickled Okra?
Garlic-Dill Pickled Okra is a crunchy probiotic snack made by fermenting fresh okra with garlic and dill. It offers a delicious tangy flavor while providing gut health benefits.
How long does it take to ferment Garlic-Dill Pickled Okra?
Fermentation can take anywhere from 3 to 10 days depending on your taste preference and room temperature. Start tasting after three days!
Can I customize my Garlic-Dill Pickled Okra?
Absolutely! You can add spices like red pepper flakes for heat or switch up the herbs according to your taste. Experimentation makes this recipe even more enjoyable.
How do I know when my pickled okra is ready?
Taste testing is key! Once they reach your desired tanginess, they’re ready. Ensure they smell fresh and have no signs of spoilage before consuming.
Final Thoughts
Garlic-Dill Pickled Okra is an exciting way to enjoy this often-misunderstood vegetable while reaping its health benefits. The crunchy texture paired with garlicky dill flavors makes these pickles perfect as snacks or side dishes. Feel free to customize them with your favorite spices! Give this easy ferment a try; you won’t be disappointed!
Garlic-Dill Pickled Okra (crunchy, not slimy probiotic snack!)
- Total Time: 3 minute
- Yield: Approximately 4 servings (20 pieces) 1x
Description
Garlic-Dill Pickled Okra is a refreshing and crunchy probiotic snack that transforms the commonly misunderstood vegetable into a delightful treat. With its vibrant flavors of garlic and dill, this quick and easy recipe elevates okra to new heights, making it a perfect addition to picnics, parties, or even as a solo snack at home. Unlike traditional pickles, these okra pods maintain their crisp texture without the slime often associated with them. Packed with gut-friendly probiotics, they not only tantalize your taste buds but also promote digestive health. Customize your batch with your favorite spices for a personal touch, and enjoy them straight from the jar or as part of your favorite meals.
Ingredients
- 12 to 16 fresh okra pods
- 1 cup pure water
- 2 teaspoons sea salt
- 2 cloves garlic, thinly sliced
- 1/4 cup onion, sliced
- 1 teaspoon dried dill seed
- 1/2 teaspoon mustard seed
- 1/2 teaspoon whole black peppercorns
Instructions
- Thoroughly wash and trim tops of okra pods.
- In a bowl, dissolve sea salt in water to create the brine.
- Add dried dill seed, mustard seed, and peppercorns to the bottom of a Mason jar.
- Pack okra vertically into the jar snugly.
- Layer sliced garlic and onion throughout the okra.
- Pour brine over packed okra, leaving space at the top for weights.
- Place fermenting weights on top to keep okra submerged.
- Secure fermenting lid on the jar and let it ferment at room temperature for 3 to 10 days.
- Once fermented to desired taste, switch to a regular lid for storage.
- Prep Time: 15 minutes
- Cook Time: None
- Category: Snack
- Method: Fermentation
- Cuisine: American
Nutrition
- Serving Size: 5 pieces (50g)
- Calories: 15
- Sugar: 0g
- Sodium: 100mg
- Fat: 0g
- Saturated Fat: 0g
- Unsaturated Fat: 0g
- Trans Fat: 0g
- Carbohydrates: 3g
- Fiber: 1g
- Protein: 1g
- Cholesterol: 0mg
Keywords: Use fresh okra pods for optimal texture and flavor. Adjust spice levels according to preference. Store pickles in an airtight container in the fridge; they can last for up to 3-4 weeks.