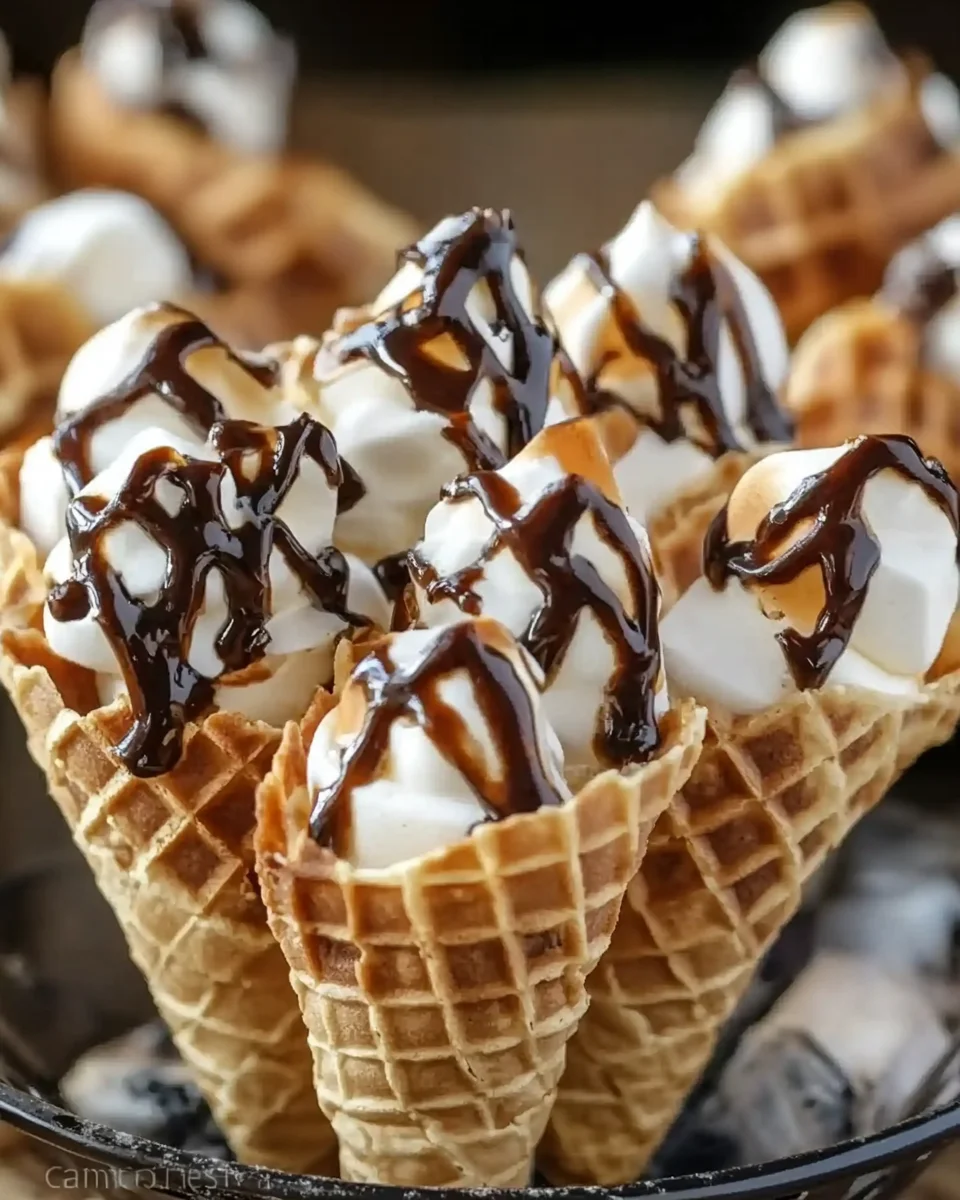
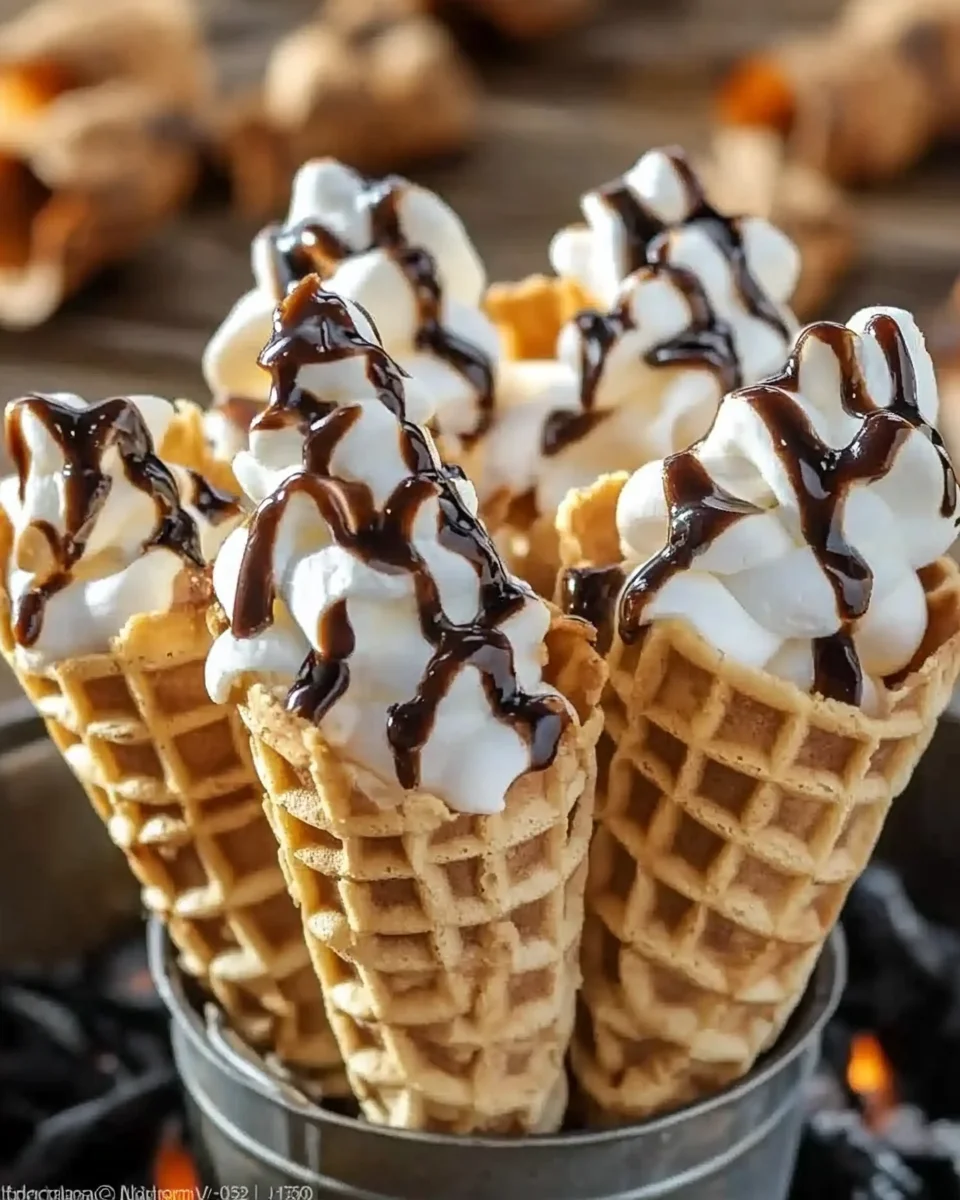
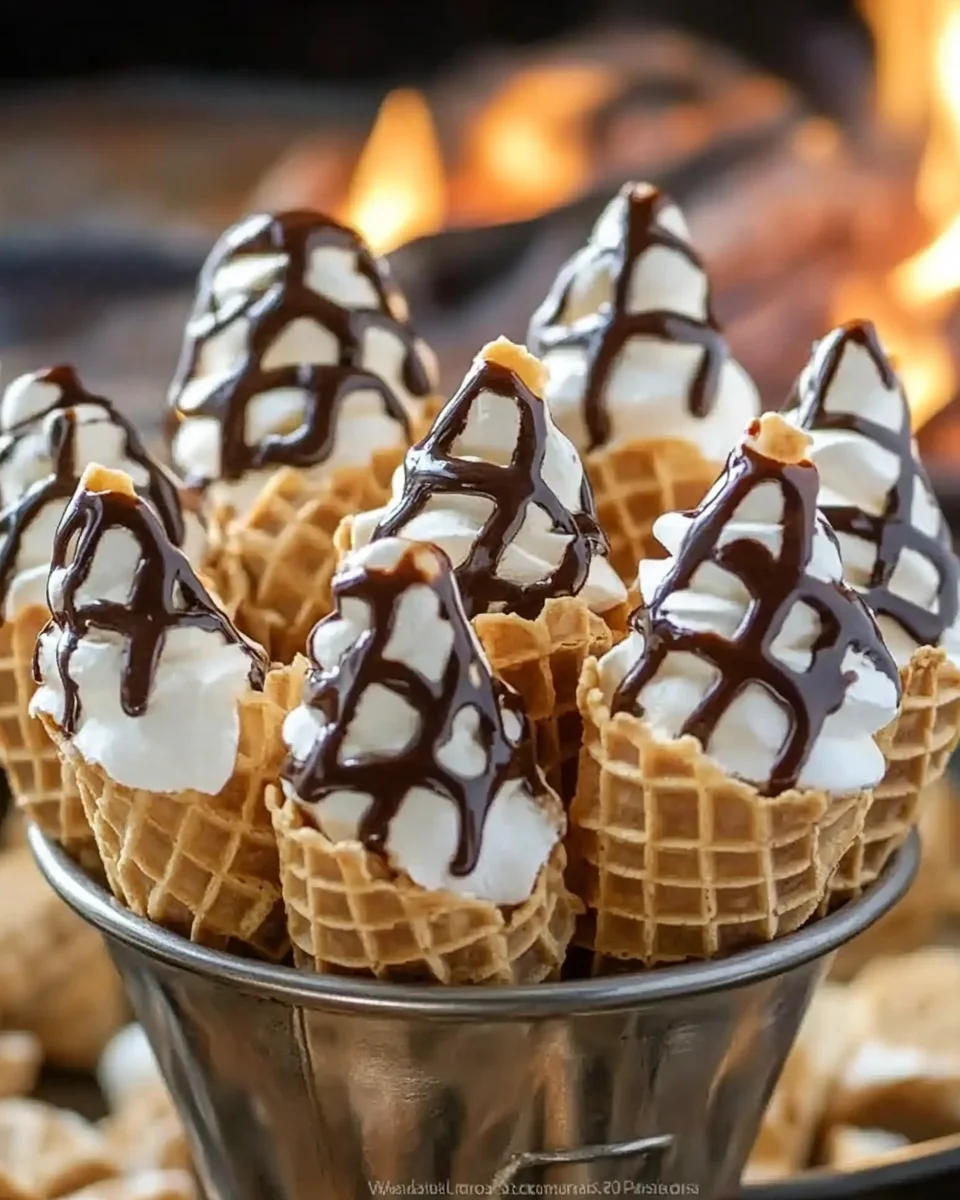
Campfire Cones
S’mores Campfire Cones are a delightful twist on the classic campfire dessert. These sweet treats combine the gooey goodness of marshmallows and chocolate chips, all packed inside a crispy waffle cone. Perfect for gatherings, bonfires, or a cozy night at home, these cones are not only easy to make but also fun to eat. Their unique presentation and simple preparation make them a standout choice for any occasion.
Why You’ll Love This Recipe
- Easy to Prepare: With just three ingredients and minimal prep time, you can whip up these cones in no time.
- Customizable Flavors: Feel free to add your favorite ingredients like fruits or nuts for a personal touch.
- Perfect for Any Occasion: Whether it’s a backyard barbecue or a camping trip, these cones are always a hit.
- No Mess: Enjoy delicious s’mores without the sticky hands—everything is contained within the cone!
- Family-Friendly Fun: Kids love assembling their own cones, making it an interactive treat.
Tools and Preparation
Before diving into the recipe, gather your essential tools. Having everything ready will ensure a smooth cooking experience.
Essential Tools and Equipment
- Aluminum Foil
- Oven or Grill
- Baking Sheet (if using an oven)
Importance of Each Tool
- Aluminum Foil: This helps keep the cones warm while preventing them from burning during cooking.
- Oven or Grill: You need either for heating the cones. Both methods produce delicious results.
- Baking Sheet: If you’re using an oven, this tool keeps your cones stable and makes cleanup easier.
Ingredients
S’Mores Campfire Cones are made with simple yet satisfying ingredients that bring out the best flavors.
For the Cones
- 12 Sugar or Waffle Cones
For the Filling
- 1 bag Mini Marshmallows
- 12 oz Chocolate Chips

How to Make Campfire Cones
Step 1: Fill Each Cone
Start by filling each waffle cone with mini marshmallows and chocolate chips. You can mix and match based on personal preference.
Step 2: Wrap in Aluminum Foil
Once filled, wrap each cone tightly in aluminum foil. This will help retain heat during cooking.
Step 3: Heat Up
Place the wrapped cones in a preheated oven at 350 degrees Fahrenheit or on a heated grill. Cook for about 7 to 10 minutes until everything is melted and gooey.
Step 4: Unwrap and Enjoy
Carefully unwrap each cone from the foil. Be cautious as they can be hot! Enjoy your delicious S’Mores Campfire Cones while they’re warm for the ultimate treat.
How to Serve Campfire Cones
Campfire Cones are not only fun to make but also delightful to enjoy. Here are some creative ways to serve them to your family and friends, making your outdoor gatherings even more memorable.
Individual Treats
- Serve each cone individually wrapped in foil for a fun, hands-on dessert experience.
Ice Cream Topping
- Drizzle melted chocolate or caramel over the warm campfire cones for an indulgent twist.
S’mores Bar
- Create a s’mores station where guests can customize their cones with various toppings like nuts, fruits, or different types of chocolate.
Family Style
- Place several filled cones in a basket for a communal treat that encourages sharing and interaction.
Dessert Platter
- Present your campfire cones on a large platter with fresh berries and whipped cream on the side for dipping.
How to Perfect Campfire Cones
To ensure your Campfire Cones turn out delicious every time, consider these helpful tips:
-
Choose Quality Ingredients: Use fresh marshmallows and high-quality chocolate chips for the best flavor.
-
Don’t Overstuff: Fill the cones just enough to avoid spillage when they heat up. This keeps the mess minimal.
-
Wrap Properly: Make sure each cone is tightly wrapped in aluminum foil to retain heat and melt the fillings evenly.
-
Monitor Cooking Time: Keep an eye on the cones while cooking. They should be heated until the marshmallows are gooey but not burnt.
-
Let Them Cool: After removing from heat, let them sit for a minute before unwrapping. This helps prevent burns from hot chocolate or marshmallow.
Best Side Dishes for Campfire Cones
Pairing side dishes with your Campfire Cones can elevate your outdoor dining experience. Here are some great options to consider:
-
Grilled Fruit Skewers: Fresh fruits like pineapple and strawberries grilled until caramelized provide a sweet contrast.
-
Campfire Nachos: Layer tortilla chips with cheese and toppings, then heat until melty for a savory snack.
-
Potato Salad: A classic side that offers a creamy texture, balancing out the sweetness of the cones.
-
Veggie Platter: Crisp vegetables served with dip can add a refreshing crunch alongside your dessert.
-
Chocolate-Covered Pretzels: These salty-sweet treats are perfect for munching while enjoying campfire snacks.
-
Mini Corn Dogs: Bite-sized corn dogs bring savory flavors that complement the sweetness of Campfire Cones.
Common Mistakes to Avoid
When making Campfire Cones, it’s easy to run into common pitfalls. Here are some mistakes to watch out for:
-
Overfilling the cones: If you pack too many marshmallows and chocolate chips, they may spill out during cooking. Aim for a moderate filling to keep everything contained.
-
Neglecting to wrap properly: Failing to wrap the cones securely in aluminum foil can lead to uneven heating. Make sure each cone is tightly sealed to avoid messes.
-
Using the wrong heat source: Cooking at too high a temperature can burn the cones before the inside melts. Stick with 350 degrees for best results, whether in an oven or on a grill.
-
Skipping the cooling period: Diving right into your cones after cooking can result in burns. Allow them to cool slightly before unwrapping and enjoying.
-
Not customizing fillings: Sticking with just marshmallows and chocolate limits your creativity. Experiment with fruits, nuts, or different types of chocolate for unique flavors.
Refrigerator Storage
- Campfire Cones can be stored in the refrigerator for up to 3 days.
- Place them in an airtight container to maintain freshness.
Freezing Campfire Cones
- You can freeze Campfire Cones for up to 2 months.
- Wrap each cone tightly in plastic wrap before placing them in a freezer-safe bag.
Reheating Campfire Cones
- Oven: Preheat your oven to 350 degrees, unwrap the cone, and heat it for about 5-7 minutes.
- Microwave: Remove any foil and heat on medium power for about 30 seconds. Watch closely to prevent burning.
- Stovetop: Place the wrapped cone in a skillet over low heat for about 5 minutes, turning occasionally.
Frequently Asked Questions
What are Campfire Cones?
Campfire Cones are a fun twist on traditional s’mores, where ingredients like marshmallows and chocolate chips are packed into a waffle cone and heated until gooey.
How do I customize my Campfire Cones?
You can customize your Campfire Cones by adding fruits like strawberries or bananas, different types of chocolate, or even peanut butter for extra flavor.
Can I make Campfire Cones ahead of time?
Yes! You can prepare them ahead by filling the cones and wrapping them in foil. Store them in the refrigerator until you’re ready to cook.
What’s the best way to serve Campfire Cones?
Serve them warm right after cooking. Unwrap them carefully and enjoy as they ooze delicious melted goodness!
Final Thoughts
The versatility of Campfire Cones makes them an exciting dessert option for any gathering. Their ease of preparation allows you to customize fillings based on personal preferences or seasonal ingredients. Don’t hesitate—try these delightful treats at your next outdoor adventure!

S’mores Campfire Cones
- Total Time: 20 minutes
- Yield: Serves 12 1x
Description
S’mores Campfire Cones are a fun and delicious twist on the classic campfire treat. Picture crunchy waffle cones filled with gooey mini marshmallows and rich chocolate chips, all melted to perfection over a fire or in your oven. These delightful cones are perfect for family gatherings, bonfires, or cozy nights at home, offering an interactive dessert experience that kids and adults alike will love.
Ingredients
- 12 Sugar or Waffle Cones
- 1 bag Mini Marshmallows
- 12 oz Chocolate Chips
Instructions
- Fill each waffle cone with mini marshmallows and chocolate chips, adjusting quantities based on personal taste.
- Wrap each filled cone tightly in aluminum foil.
- Place the wrapped cones in a preheated oven at 350°F or on a grill; cook for 7 to 10 minutes until the fillings have melted.
- Carefully unwrap the cones and enjoy while warm.
- Prep Time: 10 minutes
- Cook Time: 10 minutes
- Category: Dessert
- Method: Baking/Grilling
- Cuisine: American
Nutrition
- Serving Size: 1 cone (68g)
- Calories: 290
- Sugar: 30g
- Sodium: 55mg
- Fat: 7g
- Saturated Fat: 4g
- Unsaturated Fat: 2g
- Trans Fat: 0g
- Carbohydrates: 54g
- Fiber: 1g
- Protein: 3g
- Cholesterol: 0mg
Keywords: Choose high-quality chocolate chips and fresh marshmallows for the best flavor. Customize your cones by adding fruits like strawberries or bananas, or even nut butter for extra richness. Monitor cooking time closely to avoid burning; enjoy the cones once they’re warm and gooey.