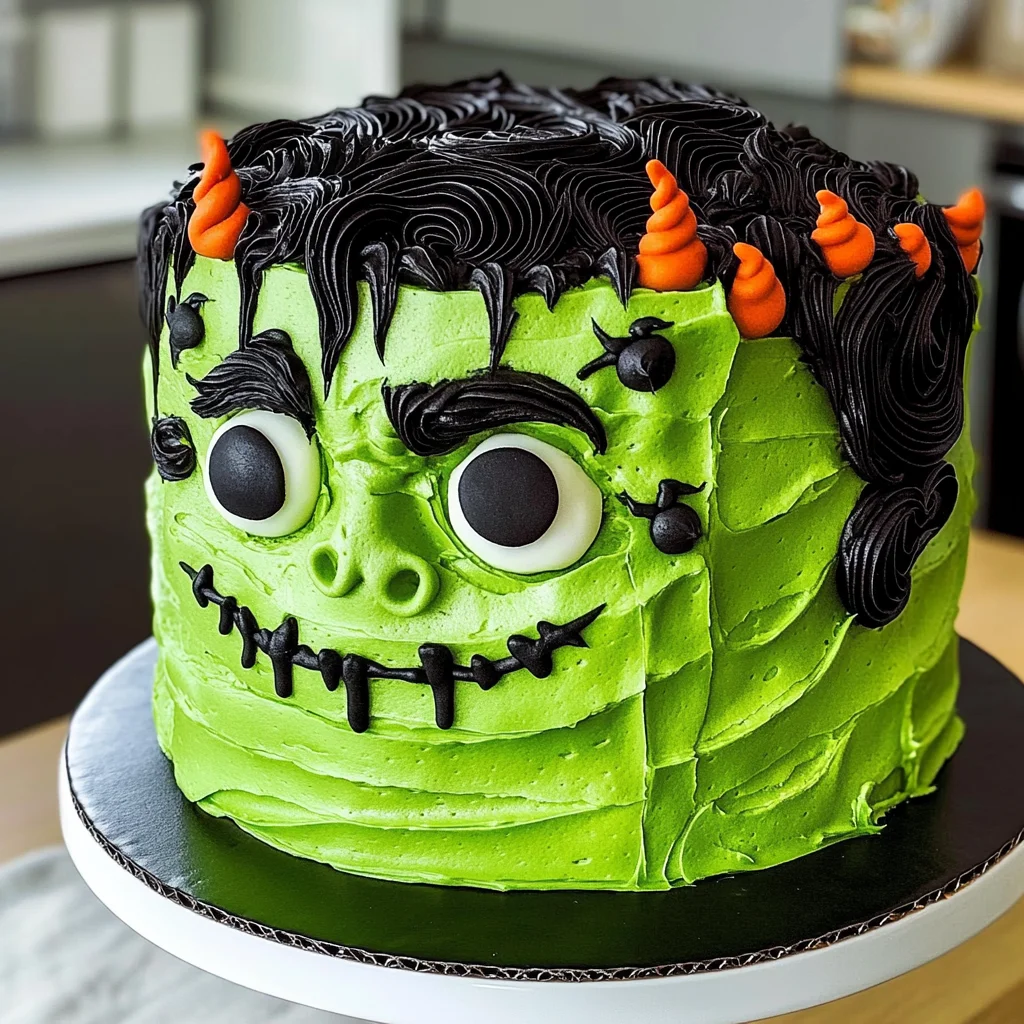
Frankenstein Cake
This Frankenstein cake is the perfect Halloween dessert! With its vibrant green velvet layers and creamy buttercream frosting, it’s both a treat for the eyes and the taste buds. Ideal for Halloween parties, birthdays, or any spooky gathering, this cake stands out with its unique color and flavor. Its moist texture and delicious cream cheese buttercream make it a beloved choice for all ages.
Why You’ll Love This Recipe
- Eye-Catching Design: The bright green color makes this cake a stunning centerpiece for any Halloween celebration.
- Moist and Flavorful: The combination of buttermilk and cocoa powder results in a rich, moist cake that everyone will enjoy.
- Versatile Occasions: Perfect not only for Halloween but also for themed parties, birthdays, or any fun gathering.
- Easy to Make: With simple steps and readily available ingredients, even beginners can create this delightful dessert.
- Customizable Decor: Get creative with your frosting designs to match your theme or personal style.
Tools and Preparation
To prepare this spooky delight, you’ll need some essential tools. Having the right equipment will make the baking process smoother and more enjoyable.
Essential Tools and Equipment
- 10-inch greaseproof cake board
- Spinning cake stand
- Small offset spatula
- Large piping bag
- Small piping bags (3)
- Large round piping tips (2)
- Small round piping tip
- Tiny piping tip
Importance of Each Tool
- Spinning Cake Stand: This tool allows you to easily frost and decorate your cake from all angles, ensuring an even finish.
- Piping Bags: Essential for creating decorative designs with frosting, making your cake look professional without much effort.
Ingredients
This Frankenstein cake features a delightful mix of ingredients that come together to create a moist and delicious treat.
For the Cake Layers
- 2 1/2 cups cake flour (300g)
- 2 Tbsp unsweetened cocoa powder, sifted (10g)
- 1 tsp baking soda (6g)
- 1/2 tsp fine salt (3g)
- 1/2 cup unsalted butter, room temperature (113g)
- 1 3/4 cups granulated sugar (350g)
- 2 large eggs, room temperature (112g)
- 1 1/4 cups buttermilk, room temperature (300g)
- 2/3 cup vegetable or canola oil (145g)
- 2 squirts of green gel food coloring (or 1 Tbsp liquid food coloring)
- 2 tsp vanilla extract or vanilla bean paste (8g)
- 1 tsp white vinegar (4g)
For the Cream Cheese Buttercream
- 1 1/2 cups unsalted butter, room temperature (339g – 3 sticks)
- 1/2 cup full-fat cream cheese, room temperature (113g or 4 oz.)
- 1 Tbsp vanilla extract or vanilla bean paste (12g)
- 1 tsp fine salt (6g)
- 8 cups powdered sugar (1000g)
- 2 Tbsp heavy whipping cream, room temperature (30g)
For Decoration
- Electric Green Gel Food Coloring
- Black Gel Food Coloring
How to Make Frankenstein Cake
Step 1: Preheat the Oven
Preheat your oven to 350°F (175°C). Prepare two round cake pans by greasing them with butter and lining them with parchment paper.
Step 2: Mix Dry Ingredients
In a large bowl, whisk together:
1. Cake flour
2. Cocoa powder
3. Baking soda
4. Salt
Step 3: Cream Butter and Sugar
In another bowl, beat together unsalted butter and granulated sugar until light and fluffy. This should take about 3-5 minutes.
Step 4: Add Eggs and Wet Ingredients
Add eggs one at a time to the butter mixture, mixing well after each addition. Then add buttermilk, vegetable oil, food coloring, vanilla extract, and vinegar. Mix until well combined.
Step 5: Combine Dry and Wet Mixtures
Gradually add the dry ingredient mixture into the wet ingredients. Mix until just combined; do not overmix.
Step 6: Bake
Divide the batter evenly between the prepared pans. Bake in preheated oven for about 28 minutes or until a toothpick comes out clean when inserted into the center.
Step 7: Cool Cakes
Allow cakes to cool in pans for about 10 minutes before transferring them to wire racks to cool completely.
Step 8: Make Buttercream Frosting
While cakes are cooling, beat together unsalted butter and cream cheese until smooth. Gradually add powdered sugar while mixing on low speed until fully combined. Add vanilla extract and salt; mix well. Adjust consistency with heavy whipping cream if necessary.
Step 9: Assemble Cake
Once cooled, place one cake layer on a greaseproof board. Spread a layer of frosting on top before adding the second layer. Frost the entire outside of the cake smoothly.
Step 10: Decorate
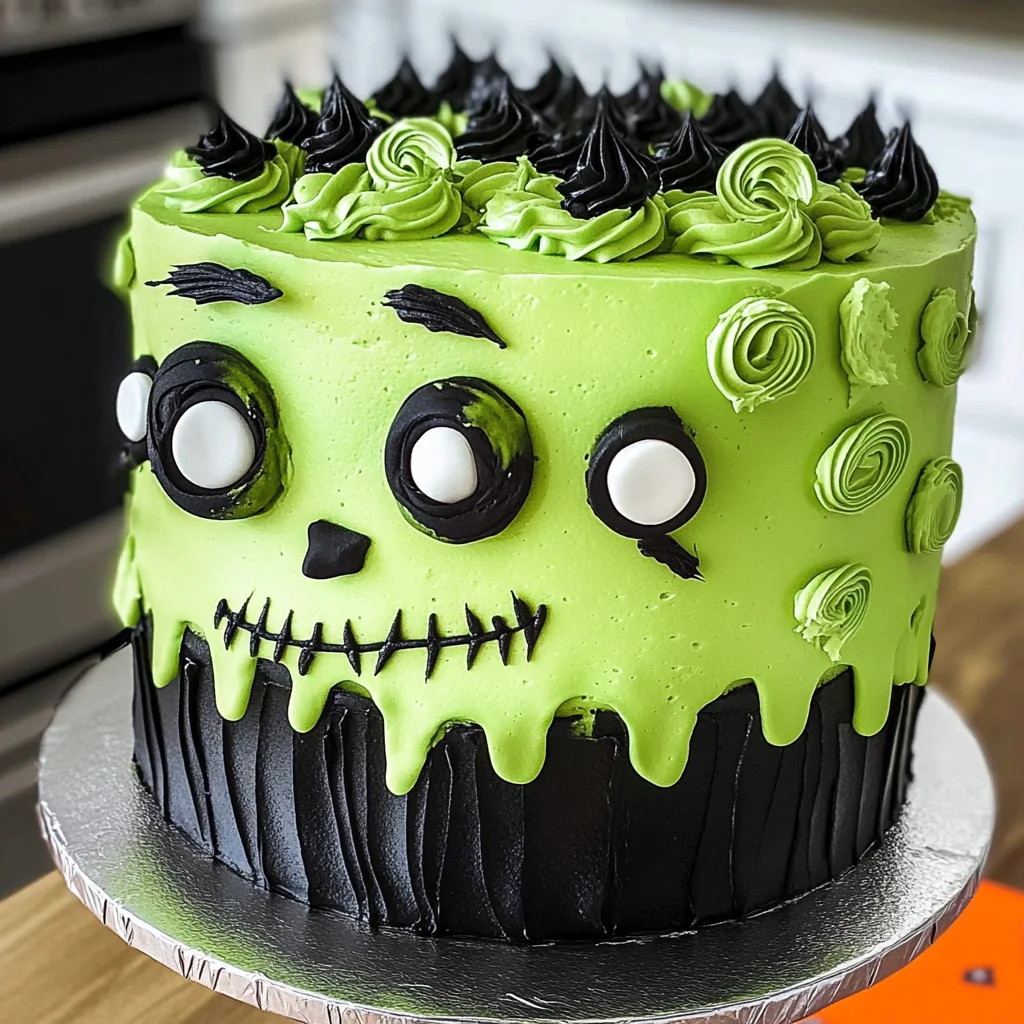
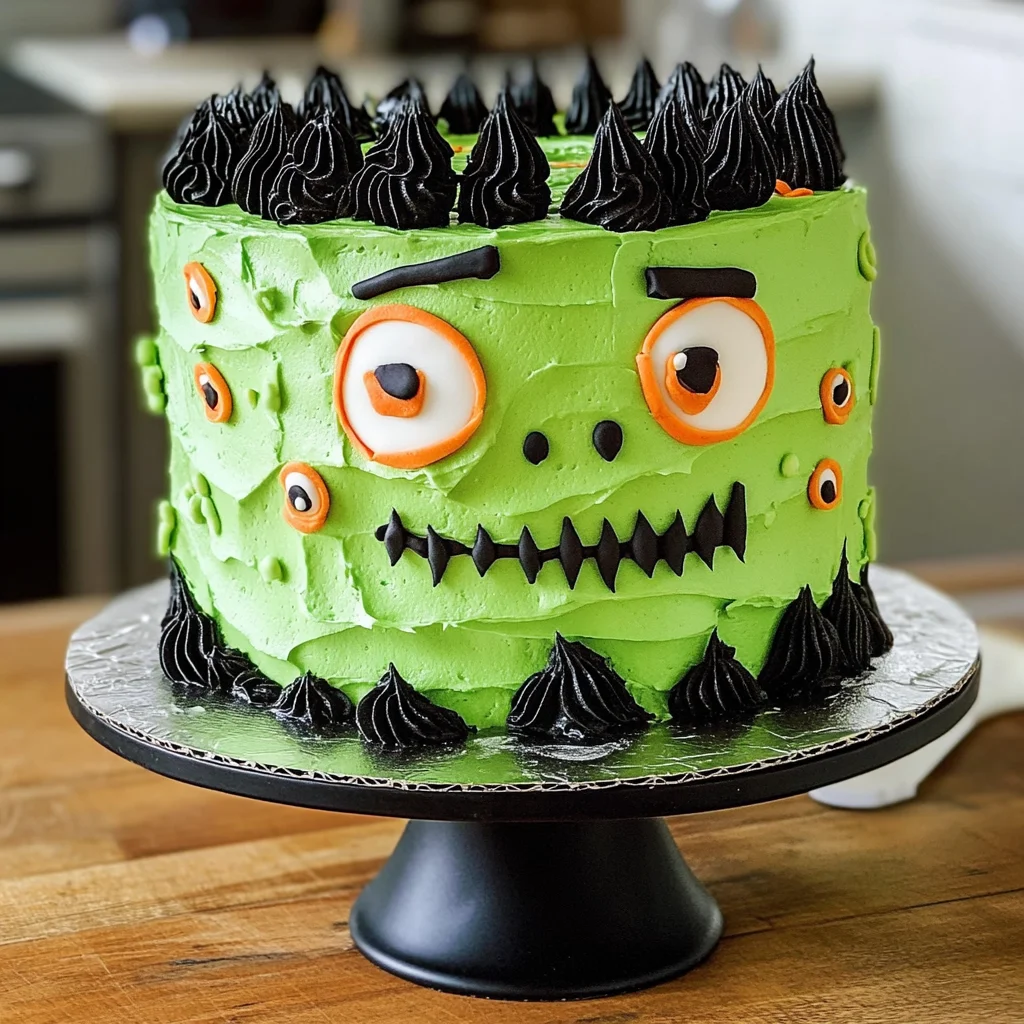
Use piping bags with various tips to create fun designs on your Frankenstein cake using colored gel food coloring for accents. Enjoy your spooky creation!
How to Serve Frankenstein Cake
This delightful Frankenstein cake is not just a treat for the eyes but also a delicious dessert for any Halloween celebration. Here are some creative serving suggestions to elevate your spooky cake experience.
Individual Servings
- Serve slices on decorative Halloween plates for a festive touch.
Cake Pops
- Transform leftover cake into cake pops by crumbling the cake, mixing with frosting, and dipping in green chocolate.
Cupcake Version
- Bake mini versions of the Frankenstein cake as cupcakes, topped with green buttercream and fun edible eyes.
Festive Toppings
- Add gummy worms or spiders on top of each slice for an extra creepy effect.
Ice Cream Pairing
- Serve with a scoop of vanilla or mint chocolate chip ice cream to complement the rich flavor of the cake.
How to Perfect Frankenstein Cake
To ensure your Frankenstein cake turns out perfectly every time, consider these helpful tips:
-
Measure Accurately: Precision in measuring ingredients is key to achieving the perfect texture and flavor.
-
Use Room Temperature Ingredients: Ensure eggs, butter, and buttermilk are at room temperature for better incorporation and fluffiness.
-
Don’t Overmix: Gently mix your batter until just combined to avoid dense cakes; overmixing can lead to tough textures.
-
Check Oven Temperature: Use an oven thermometer to confirm your oven’s temperature is accurate; baking at the wrong temperature can affect rising.
-
Cool Completely: Allow your cake layers to cool completely before frosting; this prevents melting and helps maintain structure.
Best Side Dishes for Frankenstein Cake
Pairing side dishes with your Frankenstein cake can enhance the overall Halloween feast. Here are some fun side dishes to consider:
-
Witch’s Brew Soup: A vibrant green pea soup garnished with croutons adds a whimsical touch to your table.
-
Monster Mash Potatoes: Creamy mashed potatoes colored with green food dye, served as a playful nod to the Halloween theme.
-
Eyeball Salad: A fresh salad made with mozzarella balls, cherry tomatoes, and olives resembling eyeballs for a spooky twist.
-
Ghostly Garlic Bread: Toasted bread shaped like ghosts, spread with garlic butter, makes a delicious side that complements most meals.
-
Pumpkin Pasta: A creamy pumpkin sauce over pasta offers a savory option that contrasts well with dessert.
-
Spooky Veggie Platter: Create a colorful array of veggies arranged like a haunted graveyard with dip served in mini cauldrons.
Common Mistakes to Avoid
When making your Frankenstein Cake, be mindful of these common pitfalls to ensure a successful baking experience.
- Skipping Ingredient Room Temperature: Using cold ingredients can affect the batter’s texture. Always let eggs and butter sit out for at least 30 minutes before use.
- Overmixing the Batter: Overmixing can lead to a dense cake. Mix just until the dry ingredients are incorporated for a light and airy texture.
- Not Measuring Ingredients Accurately: Accurate measurements are crucial for baking success. Use a kitchen scale or measuring cups carefully to avoid errors.
- Ignoring Oven Temperature: Baking at the wrong temperature can result in uneven baking. Always preheat your oven and use an oven thermometer if necessary.
- Underestimating Cooling Time: Cutting the cake too early can cause it to crumble. Allow the cake layers to cool completely before frosting.
Storage & Reheating Instructions
Refrigerator Storage
- Store covered in an airtight container for up to 5 days.
- Keep slices separated with parchment paper to prevent sticking.
Freezing Frankenstein Cake
- Wrap tightly in plastic wrap and aluminum foil for up to 3 months.
- Thaw overnight in the refrigerator when ready to enjoy.
Reheating Frankenstein Cake
- Oven: Preheat to 350°F (175°C), cover the cake with foil, and heat for about 10-15 minutes until warm.
- Microwave: Heat individual slices on low power for about 15-20 seconds, checking frequently.
- Stovetop: Place slices in a skillet over low heat, cover, and warm for about 5-7 minutes.
Frequently Asked Questions
Here are some common questions about making Frankenstein Cake that you might find helpful.
What is a Frankenstein Cake?
Frankenstein Cake is a fun and festive dessert made with green velvet cake layers and cream cheese buttercream, perfect for Halloween celebrations.
How do I customize my Frankenstein Cake?
You can customize your Frankenstein Cake by adding different colors or decorating it with spooky toppings like edible eyes or candy spiders.
Can I make this cake ahead of time?
Yes! You can bake the cake layers ahead of time and freeze them. Frosting is best done fresh before serving.
What if I don’t have gel food coloring?
If you don’t have gel food coloring, liquid food coloring will work as well. Just adjust the amount until you achieve your desired color intensity.
How should I store leftover Frankenstein Cake?
Store any leftover cake in an airtight container in the refrigerator for up to five days or freeze it for later enjoyment.
Final Thoughts
This Frankenstein Cake is not only visually striking but also delicious and versatile. Feel free to customize it with different colors or decorations to fit your theme. Whether it’s for Halloween or any celebration, this cake will surely impress your guests!
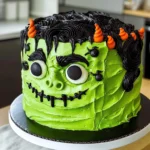
Frankenstein Cake
- Total Time: 58 minutes
- Yield: Serves approximately 12 1x
Description
Get ready to impress your guests with a spooktacular Frankenstein Cake! This vibrant green velvet dessert, layered with rich cream cheese buttercream frosting, is perfect for Halloween parties, birthdays, or any festive gathering. Its eye-catching design and moist texture make it a delightful treat for all ages. Plus, it’s easy to make, allowing even novice bakers to create a show-stopping centerpiece. Customize the decorations to match your theme and enjoy this fun twist on traditional cake!
Ingredients
- 2 1/2 cups cake flour
- 2 Tbsp unsweetened cocoa powder
- 1 tsp baking soda
- 1/2 tsp fine salt
- 1/2 cup unsalted butter, room temperature
- 1 3/4 cups granulated sugar
- 2 large eggs, room temperature
- 1 1/4 cups buttermilk, room temperature
- 2/3 cup vegetable or canola oil
- 2 squirts of green gel food coloring (or 1 Tbsp liquid food coloring)
- 2 tsp vanilla extract or vanilla bean paste
- 1 tsp white vinegar
- 1 1/2 cups unsalted butter, room temperature (for frosting)
- 1/2 cup full-fat cream cheese, room temperature
- 1 Tbsp vanilla extract or vanilla bean paste (for frosting)
- 1 tsp fine salt (for frosting)
- 8 cups powdered sugar
- 2 Tbsp heavy whipping cream, room temperature
Instructions
- Preheat oven to 350°F (175°C). Grease and line two round cake pans.
- In a bowl, whisk together flour, cocoa powder, baking soda, and salt.
- Cream butter and sugar until light and fluffy. Add eggs one at a time, then mix in buttermilk, vegetable oil, food coloring, vanilla extract, and vinegar.
- Gradually combine dry ingredients into wet mixture without overmixing.
- Divide batter evenly between pans and bake for about 28 minutes until a toothpick comes out clean.
- Cool cakes in pans for 10 minutes before transferring to wire racks.
- For frosting, beat butter and cream cheese until smooth; gradually add powdered sugar and mix in vanilla and salt.
- Assemble cooled layers with frosting in between; frost the entire outside of the cake.
- Prep Time: 30 minutes
- Cook Time: 28 minutes
- Category: Dessert
- Method: Baking
- Cuisine: American
Nutrition
- Serving Size: 1 slice (105g)
- Calories: 420
- Sugar: 38g
- Sodium: 360mg
- Fat: 20g
- Saturated Fat: 9g
- Unsaturated Fat: 11g
- Trans Fat: 0g
- Carbohydrates: 54g
- Fiber: 1g
- Protein: 5g
- Cholesterol: 50mg
Keywords: Decorate with additional gel food colors or themed toppings like edible eyes for extra fun. Consider making mini cupcakes or cake pops using leftover cake for variation.

