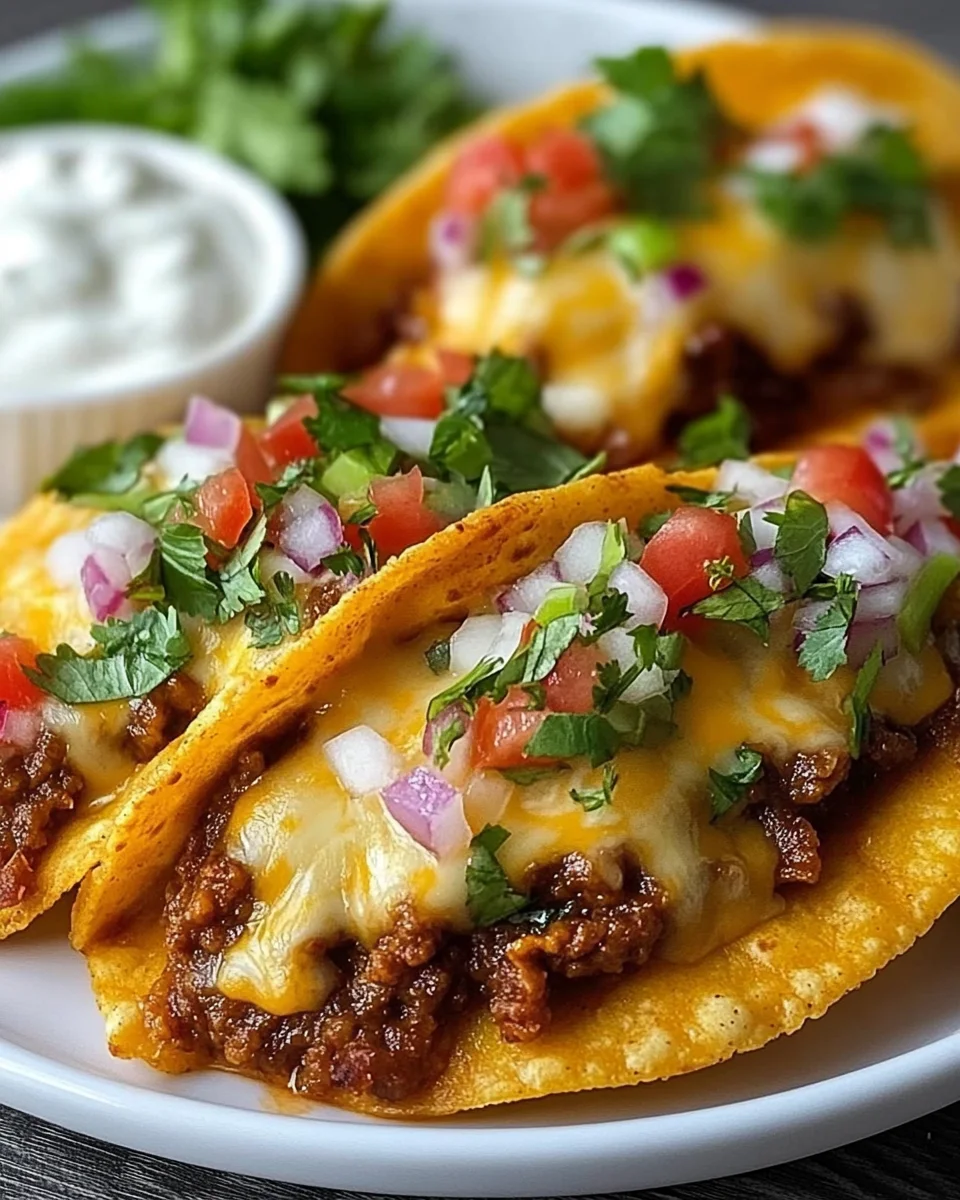
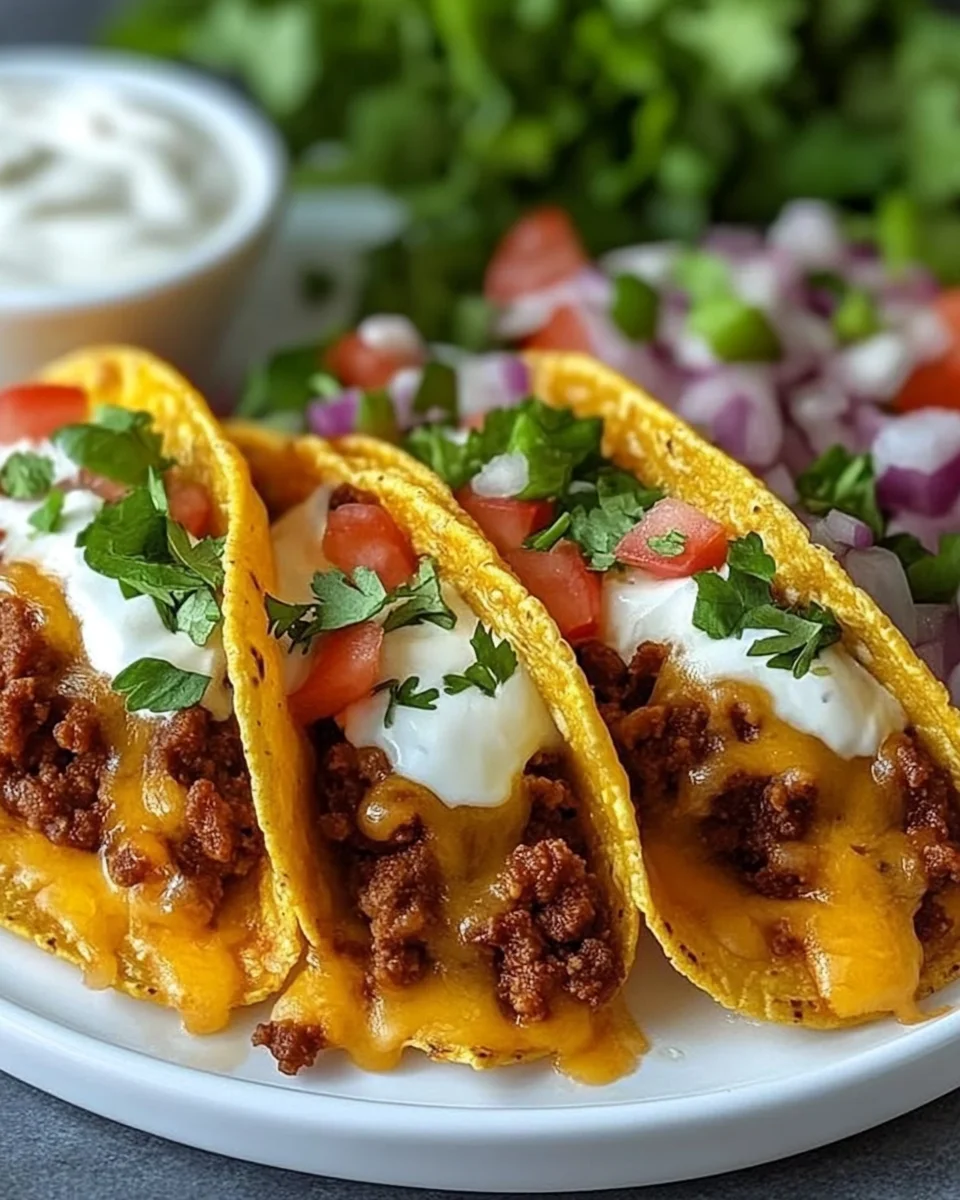
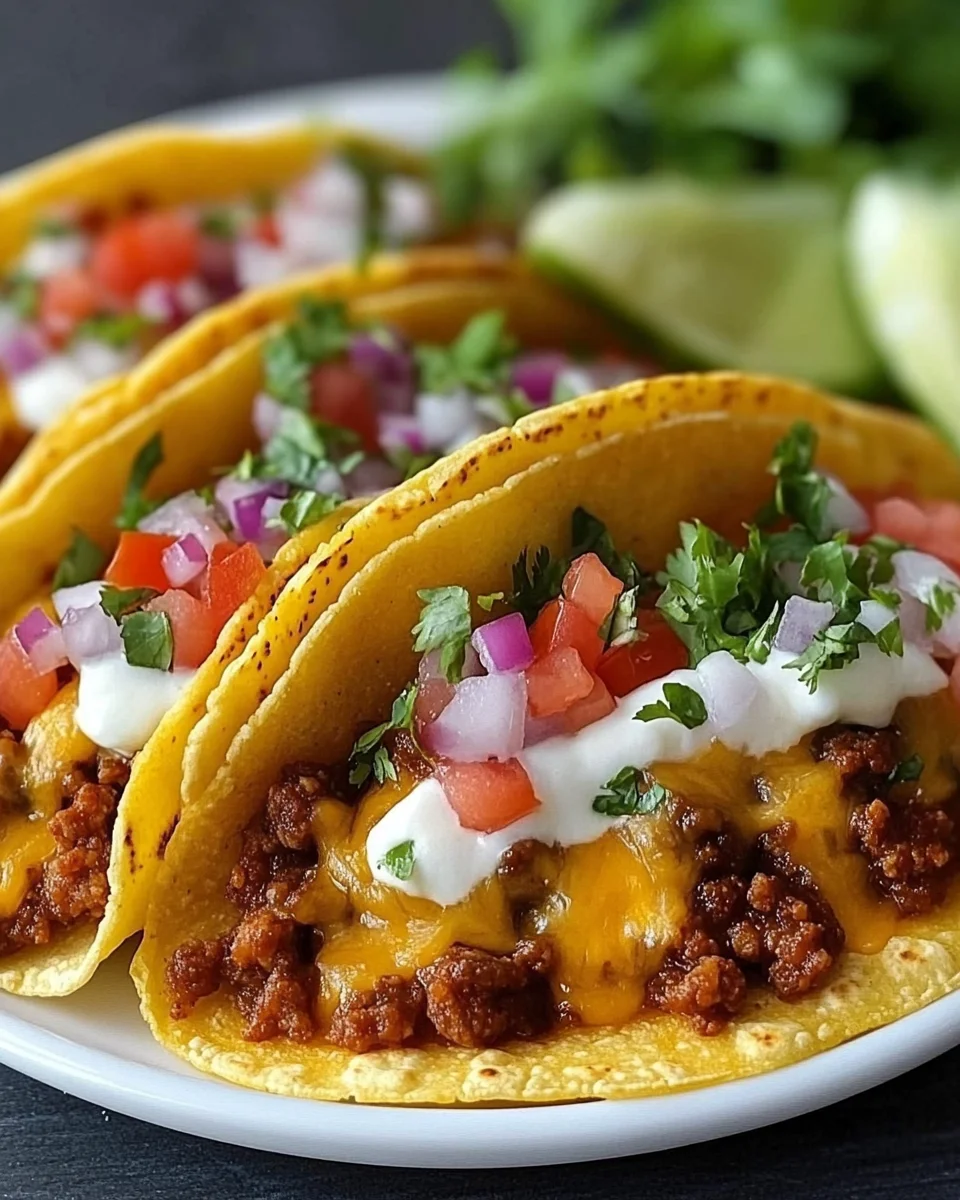
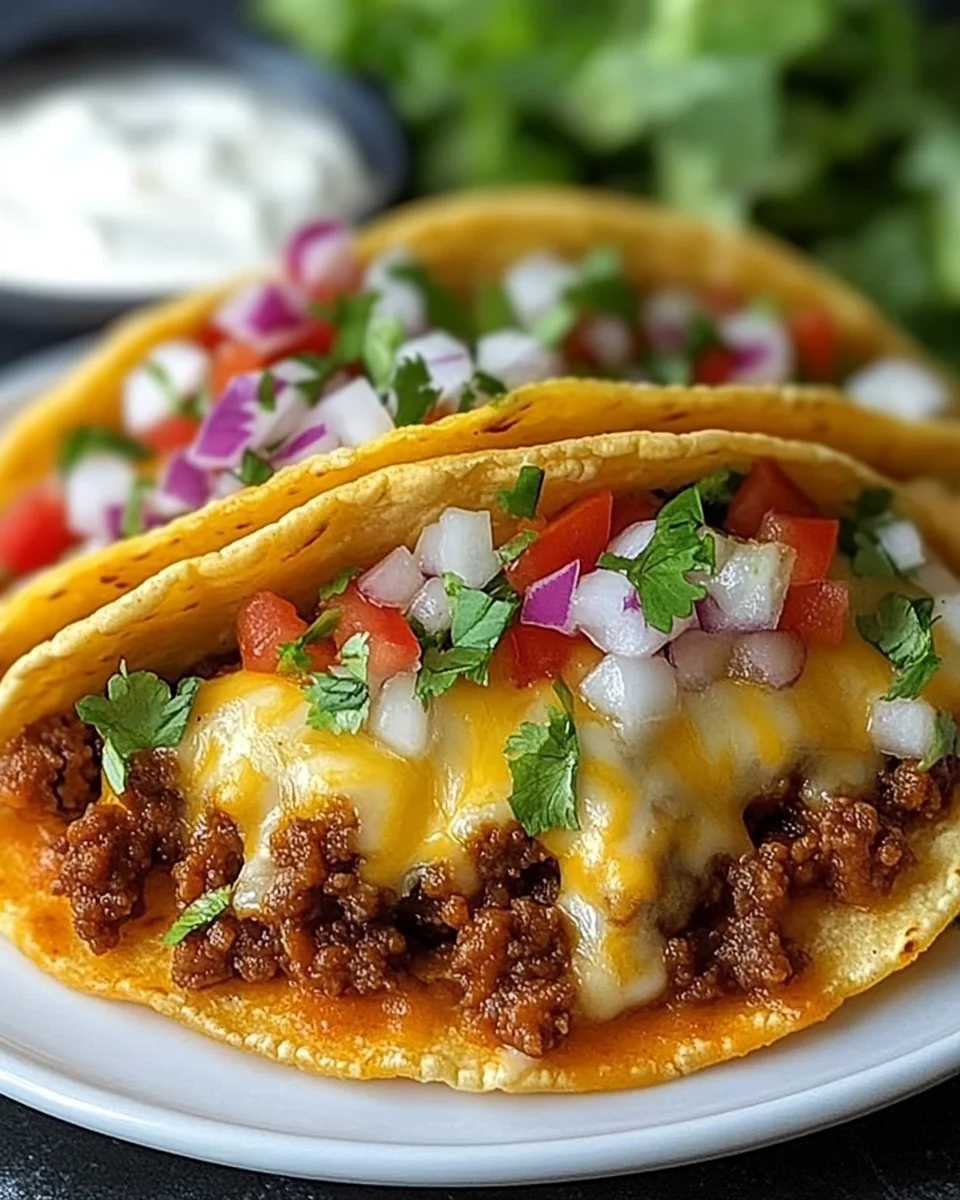
Loaded Cheesy Pocket Tacos
Loaded Cheesy Pocket Tacos are the perfect solution for busy weeknights or casual gatherings. These delicious hand-held tacos marry the comforting flavors of taco night with the convenience of biscuit dough. Ideal for family dinners, parties, or even game day, these cheesy delights are sure to please everyone at your table. Their unique pocket shape holds all the tasty fillings while being easy to eat, making them a standout dish for any occasion.
Why You’ll Love This Recipe
- Quick and Easy: With just a few simple steps, you can whip up these Loaded Cheesy Pocket Tacos in no time.
- Flavor Packed: The combination of seasoned beef, melted cheese, and zesty salsa creates a mouthwatering flavor explosion.
- Customizable: Feel free to add your favorite toppings like sour cream or fresh veggies to make each taco uniquely yours.
- Kid-Friendly: Kids love handheld meals! These tacos are not only fun to eat but also a great way to introduce new flavors.
- Perfect for Leftovers: Any leftover filling can be repurposed in salads or wraps for a quick lunch.
Tools and Preparation
Before diving into this recipe, gather the essential tools that will make your cooking experience smooth and enjoyable.
Essential Tools and Equipment
- Skillet
- Baking sheet
- Fork
- Measuring cups
Importance of Each Tool
- Skillet: A non-stick skillet is perfect for browning the beef evenly without sticking.
- Baking sheet: Ensures even baking and prevents any mess in your oven while cooking.
- Fork: Great for sealing the edges of your pocket tacos to keep all that delicious filling inside.
Ingredients
For the Filling
- 1 lb ground beef
- 1 packet taco seasoning
- 1/4 cup water
- 1 cup shredded cheddar cheese
- 1/2 cup salsa
For the Dough
- 1 can refrigerated biscuit dough (8 biscuits)
For Garnish (Optional)
- sour cream
- lettuce
- diced tomatoes
How to Make Loaded Cheesy Pocket Tacos
Step 1: Preheat the Oven
Preheat your oven to 375°F (190°C) to ensure it’s hot enough for baking those tasty tacos.
Step 2: Brown the Beef
In a skillet over medium heat:
1. Add ground beef.
2. Cook until browned, about 5-7 minutes.
3. Drain off excess fat.
4. Stir in taco seasoning and water.
5. Simmer for 2–3 minutes until well combined.
Step 3: Prepare Biscuit Dough
On a clean surface:
1. Open the can of refrigerated biscuit dough.
2. Flatten each biscuit into a circle about 5 inches wide.
Step 4: Fill and Fold Tacos
For each flattened biscuit:
1. Spoon some of the beef mixture into the center.
2. Add shredded cheddar cheese and salsa.
3. Carefully fold it over and seal the edges using a fork.
Step 5: Bake Your Tacos
Place each filled taco on a baking sheet:
1. Bake for 12–15 minutes or until golden brown.
2. Keep an eye on them as they bake!
Step 6: Serve Warm
Remove from oven and let cool slightly:
1. Serve warm with optional toppings like sour cream, lettuce, or diced tomatoes.
2. Enjoy your delicious Loaded Cheesy Pocket Tacos!
How to Serve Loaded Cheesy Pocket Tacos
Loaded Cheesy Pocket Tacos are fun and versatile, making them perfect for any gathering or family meal. Here are some creative serving suggestions to elevate your taco experience.
Add Freshness with Toppings
- Sour Cream: A dollop of sour cream adds a creamy texture that perfectly complements the savory flavors.
- Lettuce: Shredded lettuce provides a refreshing crunch, balancing the richness of the cheese and beef.
- Diced Tomatoes: Fresh tomatoes add color and a burst of juicy flavor that brightens each bite.
Pair with Dipping Sauces
- Guacamole: This creamy avocado dip pairs wonderfully with the tacos, offering a rich and flavorful contrast.
- Hot Sauce: For those who like it spicy, a drizzle of hot sauce can kick up the flavor profile.
- Ranch Dressing: This cool dressing brings a unique twist to your tacos, adding a zesty flavor.
Serve with Sides
- Chips and Salsa: Crunchy tortilla chips served with salsa make for a classic side that everyone enjoys.
- Mexican Rice: Fluffy rice seasoned with spices can be a filling addition to your meal.
How to Perfect Loaded Cheesy Pocket Tacos
Perfecting Loaded Cheesy Pocket Tacos is all about technique and attention to detail. Follow these tips for the best results.
- Choose Quality Meat: Using lean ground beef enhances flavor without excess grease.
- Season Well: Make sure to thoroughly mix in the taco seasoning with the beef for an even taste.
- Seal Properly: Ensure edges are well sealed to prevent filling from leaking during baking.
- Experiment with Cheese: Try different cheeses like Monterey Jack or pepper jack for varied flavors.
- Don’t Overfill: Keep fillings moderate to ensure easy sealing and even cooking.
- Let Cool Before Serving: Allowing them to cool slightly helps maintain their shape when serving.
Best Side Dishes for Loaded Cheesy Pocket Tacos
Pairing sides with your Loaded Cheesy Pocket Tacos can enhance your meal experience. Here are some delicious options that complement these tasty tacos.
- Spanish Rice: Seasoned rice cooked with tomatoes and spices makes for a hearty complement.
- Refried Beans: Creamy refried beans offer protein and richness, perfect alongside the tacos.
- Corn on the Cob: Grilled or boiled corn adds sweetness and crunch, enhancing the meal’s texture.
- Coleslaw: A tangy coleslaw adds freshness and a crunchy contrast to the savory tacos.
- Black Bean Salad: This salad is packed with flavor and nutrients, making it a vibrant side dish choice.
- Queso Dip: Warm cheese dip served with tortilla chips makes an indulgent addition to your feast.
Common Mistakes to Avoid
When making Loaded Cheesy Pocket Tacos, avoiding common mistakes can ensure a delicious outcome.
- Using too much filling: Overfilling can cause the tacos to burst open. Stick to the recommended amount of beef, cheese, and salsa for perfect pockets.
- Not sealing edges properly: A poor seal may lead to leakage during baking. Press firmly with a fork around the edges to secure them well.
- Skipping preheating the oven: Baking in an unheated oven can result in uneven cooking. Always preheat your oven to 375°F (190°C) before placing the tacos inside.
- Ignoring baking time: Removing them too early may leave them undercooked. Keep an eye on them and bake until they are golden brown for best results.
- Choosing the wrong biscuit dough: Using a non-refrigerated or sweet dough could alter the flavor. Stick to refrigerated biscuit dough for authentic taste and texture.
Refrigerator Storage
- Store Loaded Cheesy Pocket Tacos in an airtight container.
- They will last up to 3 days in the refrigerator.
Freezing Loaded Cheesy Pocket Tacos
- Place cooked tacos in a freezer-safe container or bag.
- They can be frozen for up to 2 months.
Reheating Loaded Cheesy Pocket Tacos
- Oven: Preheat your oven to 350°F (175°C) and bake for about 10-15 minutes until heated through.
- Microwave: Heat for 30-60 seconds on a microwave-safe plate, checking regularly to avoid sogginess.
- Stovetop: Warm on medium heat in a skillet for about 5-7 minutes, turning occasionally until hot.
Frequently Asked Questions
What are Loaded Cheesy Pocket Tacos?
Loaded Cheesy Pocket Tacos are savory treats made with ground beef, cheese, and salsa wrapped in a flaky biscuit dough.
Can I customize my Loaded Cheesy Pocket Tacos?
Absolutely! You can add ingredients like beans, corn, or different cheeses based on your preferences.
How do I make Loaded Cheesy Pocket Tacos vegetarian?
To create vegetarian Loaded Cheesy Pocket Tacos, substitute ground beef with black beans or lentils seasoned with taco spices.
What toppings go well with Loaded Cheesy Pocket Tacos?
Common toppings include sour cream, lettuce, diced tomatoes, and avocado for added flavor and freshness.
Can I make Loaded Cheesy Pocket Tacos ahead of time?
Yes! You can prepare them ahead and store them in the fridge or freezer until you’re ready to bake.
Final Thoughts
Loaded Cheesy Pocket Tacos are a delightful mix of flavors and textures that make them perfect for any occasion. Their versatility allows you to customize fillings and toppings based on what you enjoy. Give this recipe a try, and enjoy these cheesy delights with friends and family!

Loaded Cheesy Pocket Tacos
- Total Time: 30 minutes
- Yield: Serves 8 tacos 1x
Description
Loaded Cheesy Pocket Tacos are a scrumptious and convenient twist on traditional tacos, perfect for busy weeknights or casual gatherings. These delightful hand-held tacos combine seasoned ground beef, melted cheese, and zesty salsa all wrapped in flaky biscuit dough, making them a hit with both kids and adults. Their unique pocket shape not only holds generous fillings but also makes them easy to eat, ensuring that every bite is packed with flavor. Customize them with your favorite toppings like sour cream or fresh veggies to create a unique culinary experience. Whether you’re hosting a game day party or enjoying a family dinner, these Loaded Cheesy Pocket Tacos will surely please everyone at your table.
Ingredients
- 1 lb ground beef
- 1 packet taco seasoning
- 1/4 cup water
- 1 cup shredded cheddar cheese
- 1/2 cup salsa
- 1 can refrigerated biscuit dough (8 biscuits)
Instructions
- Preheat your oven to 375°F (190°C).
- In a skillet over medium heat, brown the ground beef for about 5-7 minutes. Drain excess fat and mix in taco seasoning and water; simmer for 2-3 minutes.
- Flatten each biscuit into a circle approximately 5 inches wide.
- Spoon the beef mixture onto each circle and top with shredded cheese and salsa. Fold and seal edges with a fork.
- Place on a baking sheet and bake for 12–15 minutes until golden brown.
- Serve warm with optional toppings such as sour cream, lettuce, or diced tomatoes.
- Prep Time: 15 minutes
- Cook Time: 15 minutes
- Category: Main
- Method: Baking
- Cuisine: American
Nutrition
- Serving Size: 1 serving
- Calories: 290
- Sugar: 3g
- Sodium: 560mg
- Fat: 16g
- Saturated Fat: 7g
- Unsaturated Fat: 8g
- Trans Fat: 0g
- Carbohydrates: 24g
- Fiber: 2g
- Protein: 13g
- Cholesterol: 50mg
Keywords: For added flavor, consider experimenting with different cheeses like pepper jack or mozzarella. Leftover filling can be used in salads or wraps for an easy meal. These tacos can be made ahead of time and stored in the fridge or freezer before baking.