
Spooky Halloween Marble Cake
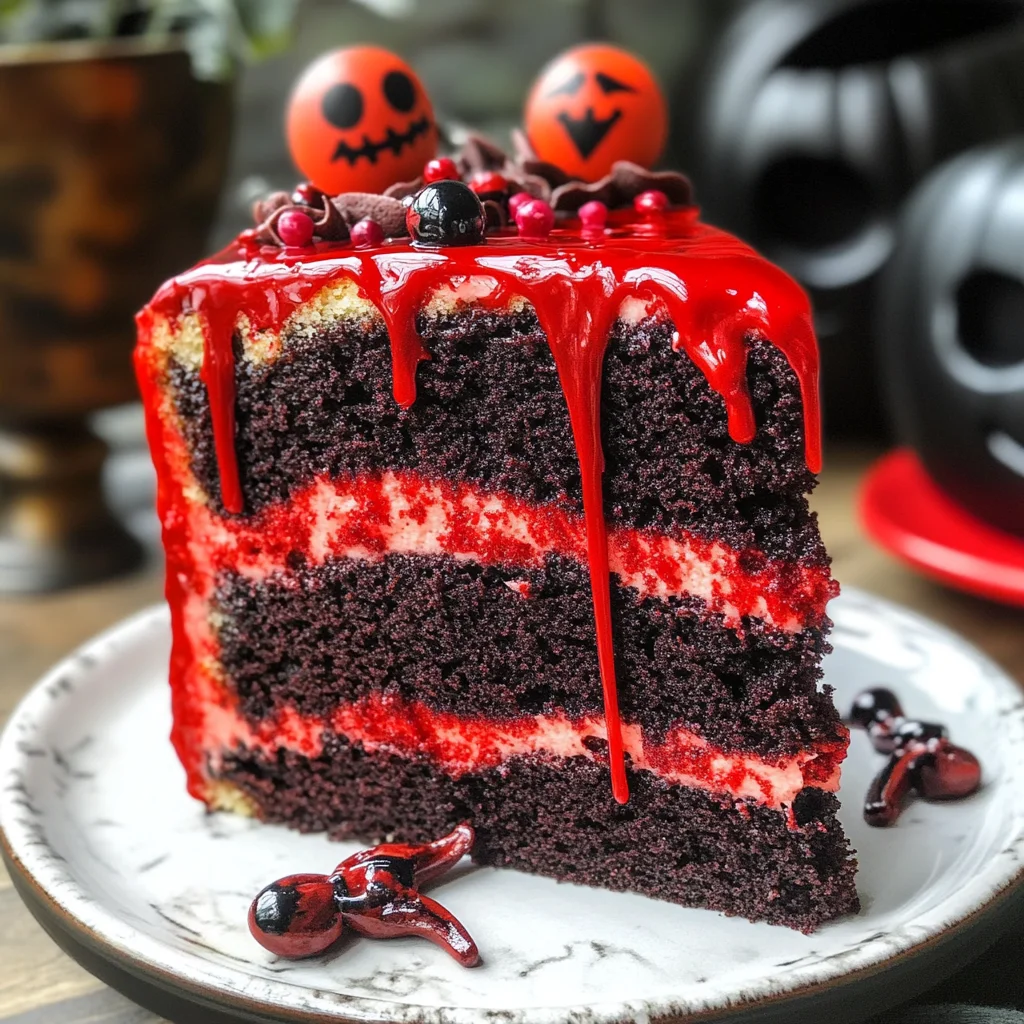
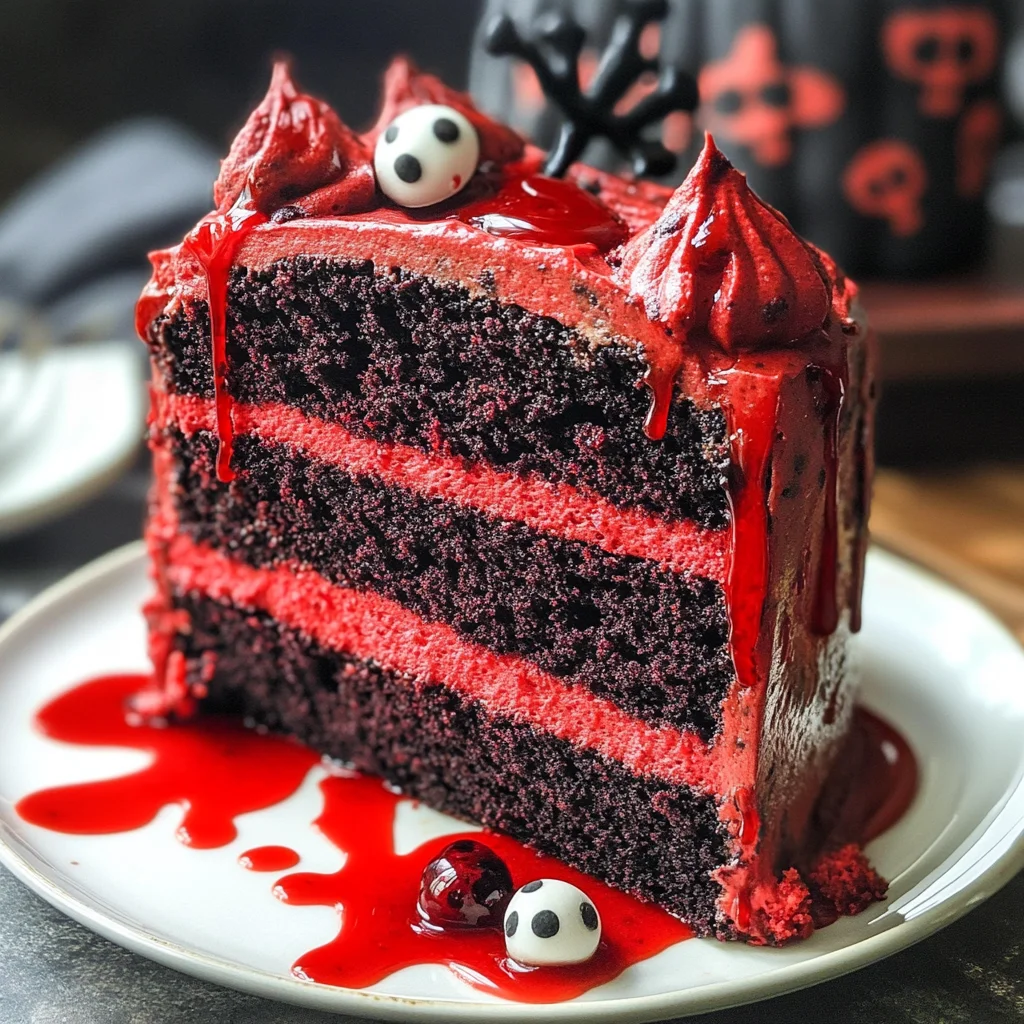
This Spooky Halloween Marble Cake is the ultimate festive dessert for Halloween parties! With its striking red and black colors, this cake will captivate your guests. It’s not just visually appealing; it boasts a delightful flavor that combines chocolate and vanilla, making it a crowd-pleaser. Decorated with drippy red blood, bloody bones, and eyeball sprinkles, this cake stands out as a unique treat for any Halloween celebration.
Why You’ll Love This Recipe
- Eye-Catching Design: The vibrant red and black marble effect makes this cake a stunning centerpiece.
- Delicious Flavor: The combination of chocolate and vanilla will satisfy all taste buds.
- Versatile Occasion: Perfect for Halloween parties, fall gatherings, or any spooky celebration.
- Easy to Customize: You can add your favorite Halloween-themed decorations or sprinkles.
- Shareable Portions: Serves 12-14 slices, great for sharing with friends and family.
Tools and Preparation
To create your Spooky Halloween Marble Cake, gather your tools and prepare your kitchen. Ensure you have everything ready before you start baking.
Essential Tools and Equipment
- Mixing bowls
- Electric mixer
- Measuring cups
- Measuring spoons
- Rubber spatula
- Baking pan (bundt pan recommended)
- Cooling rack
Importance of Each Tool
- Electric mixer: Saves time and effort in mixing ingredients to achieve a smooth batter.
- Baking pan: A bundt pan allows for even baking and creates beautiful shapes for the marble cake.
- Cooling rack: Ensures the cake cools evenly, preventing sogginess on the bottom.
Ingredients
Ingredients:
– 2 1/4 cups (293g) all purpose flour
– 2 1/2 tsp baking powder
– 1/4 tsp baking soda
– 1/2 tsp salt
– 1/2 cup (112g) unsalted butter, room temperature
– 1/2 cup vegetable oil
– 1 1/2 cups (310g) sugar
– 1 tbsp vanilla extract
– 4 large eggs
– 1 cup (240ml) buttermilk
– 5 oz bittersweet chocolate (60% cacao), chopped
– Black gel icing color
– Red gel icing color
– 2 1/4 cups (504g) unsalted butter
– 8 cups (920g) powdered sugar
– 1 cup (114g) natural unsweetened cocoa powder
– 2 tsp vanilla extract
– 5–7 tbsp (75–105ml) water/cream
– 1/4 tsp salt
– Black gel icing color
– 4 oz red Wilton candy melts
– 2 tbsp heavy whipping cream
– Sprinkles (see notes)
How to Make Spooky Halloween Marble Cake
Step 1: Preheat the Oven
Preheat your oven to 350°F (175°C). Grease your bundt pan with non-stick spray or butter to ensure easy removal after baking.
Step 2: Prepare the Batter
In a large mixing bowl, combine the flour, baking powder, baking soda, and salt. In another bowl, use an electric mixer to cream together the unsalted butter, vegetable oil, and sugar until light and fluffy. Add in the eggs one at a time, mixing well after each addition. Stir in the vanilla extract.
Step 3: Combine Dry Ingredients with Wet Ingredients
Gradually add the dry ingredient mixture into the wet mixture while alternating with buttermilk. Mix until just combined. Divide the batter into two bowls. Melt the chopped bittersweet chocolate and mix it into one bowl of batter. Color the other bowl of batter with black gel icing color.
Step 4: Create Marble Effect
Spoon alternating dollops of both batters into the prepared bundt pan. Use a knife to swirl them gently for a marble effect.
Step 5: Bake the Cake
Bake in preheated oven for about 20 minutes or until a toothpick inserted into the center comes out clean. Allow cooling in the pan for about ten minutes before transferring to a cooling rack.
Step 6: Prepare Frosting
While cooling, prepare your frosting by beating together unsalted butter and powdered sugar until creamy. Add cocoa powder, vanilla extract, salt, and water or cream until desired consistency is achieved.
Step 7: Decorate Your Cake
Once completely cool, frost your Spooky Halloween Marble Cake with chocolate frosting. Drizzle melted red candy melts on top to resemble blood. Finish by adding bloody bone sprinkles and eyeball sprinkles for that extra creepy touch!
How to Serve Spooky Halloween Marble Cake
Serving your Spooky Halloween Marble Cake can elevate your Halloween gatherings. Here are some creative ideas to make your cake stand out at any spooky celebration.
Festive Cake Platter
- Arrange slices of the marble cake on a large, decorative platter. Add fake spider webs and plastic spiders for an eerie touch.
Individual Treat Boxes
- Package slices in small, themed treat boxes. Add a note that says Have a Spooktacular Halloween! for a personal touch.
Cupcake Version
- Transform the marble cake into cupcakes. Use the same batter and decorate them with spooky icing and sprinkles for individual servings.
Layered Dessert Cups
- Crumble the marble cake into clear cups and layer it with whipped cream and eyeball sprinkles for a fun dessert option.
Themed Drink Pairing
- Serve the cake with themed drinks like blood orange soda or witches’ brew, enhancing the Halloween vibe.
How to Perfect Spooky Halloween Marble Cake
Perfecting your Spooky Halloween Marble Cake ensures it’s as delicious as it is visually appealing. Here are some tips to help you achieve the best results.
-
Use room temperature ingredients: Let butter, eggs, and buttermilk sit out before mixing to ensure even blending and better texture.
-
Don’t overmix the batter: Mix just until combined to maintain a light, fluffy cake rather than a dense one.
-
Chill your layers: Allow baked layers to cool completely before stacking; this prevents melting icing and messy decorations.
-
Experiment with colors: Feel free to adjust the gel icing colors for more vivid reds or blacks according to your spooky theme.
Best Side Dishes for Spooky Halloween Marble Cake
Pairing side dishes with your Spooky Halloween Marble Cake can enhance its appeal. Here are some great options to consider serving alongside this festive treat.
-
Witch’s Brew Punch
A fizzy fruit punch that adds a refreshing contrast to the sweetness of the cake. -
Ghostly Cheese Platter
A selection of cheeses arranged like ghosts, paired with crackers and fruits for a savory balance. -
Pumpkin Soup
A warm, creamy pumpkin soup served in small cups makes for a cozy starter alongside dessert. -
Spicy Deviled Eggs
These classic appetizers can be jazzed up with hot sauce or paprika, adding an exciting kick. -
Mummy Dogs
Hot dogs wrapped in crescent dough resembling mummies provide a fun finger food option that kids love. -
Creepy Veggie Tray
An assortment of veggies arranged like monsters with dips in bowls labeled “witches’ brew” adds color and crunch.
Common Mistakes to Avoid
Baking the perfect Spooky Halloween Marble Cake requires attention to detail. Here are some common mistakes to avoid when making this festive treat.
- Skipping the sifting – Not sifting your flour and cocoa powder can lead to clumps in your batter. Always sift for a smoother cake.
- Overmixing the batter – Mixing too much after adding eggs can result in a dense texture. Mix just until combined for a light, fluffy cake.
- Ignoring oven temperature – Baking at the wrong temperature can ruin your cake’s rise and texture. Always preheat your oven for accurate results.
- Using cold ingredients – Cold butter or eggs can cause uneven mixing and affect the cake’s fluffiness. Allow them to reach room temperature before use.
- Not measuring accurately – Inaccurate measurements can lead to inconsistencies in texture and flavor. Use kitchen scales for precise measurement.
Storage & Reheating Instructions
Refrigerator Storage
- Store leftover Spooky Halloween Marble Cake in an airtight container.
- It will stay fresh for up to 5 days in the refrigerator.
Freezing Spooky Halloween Marble Cake
- Wrap slices tightly in plastic wrap or aluminum foil.
- Freeze for up to 3 months for best quality.
Reheating Spooky Halloween Marble Cake
- Oven – Preheat to 350°F (175°C) and heat for about 10-15 minutes until warm throughout.
- Microwave – Heat individual slices on medium power for 20-30 seconds, checking doneness frequently.
- Stovetop – Place slices on a pan over low heat, cover with a lid, and warm for about 5 minutes.
Frequently Asked Questions
What is Spooky Halloween Marble Cake?
Spooky Halloween Marble Cake is a festive dessert that combines rich chocolate and vanilla flavors, swirled together in a red and black design perfect for Halloween celebrations.
How do I decorate my Spooky Halloween Marble Cake?
You can decorate your cake with drippy red icing resembling blood, add candy bones, or sprinkle bloody eyeball decorations for an extra spooky touch.
Can I customize the flavors of my marble cake?
Absolutely! You can experiment with different extracts like almond or lemon, or use flavored gel colors to create unique designs.
What’s the best way to serve Spooky Halloween Marble Cake?
Serve slices on decorative plates alongside themed treats or drinks at your Halloween party. It makes for an eye-catching centerpiece!
How long does it take to make the Spooky Halloween Marble Cake?
The total time from prep to bake is approximately 2 hours and 5 minutes, making it a manageable project even on party day!
Final Thoughts
This Spooky Halloween Marble Cake not only looks stunning but also tastes incredible with its rich flavors. It’s perfect for any gathering or as a delightful treat for family. Feel free to customize the colors and decorations according to your theme!
Spooky Halloween Marble Cake
- Total Time: 50 minutes
- Yield: Serves approximately 12 to 14 slices 1x
Description
Indulge in the festive spirit of Halloween with our Spooky Halloween Marble Cake! This striking dessert features a captivating blend of red and black, making it not only a visual delight but also a taste sensation. With its rich chocolate and vanilla flavors swirled into a marbled masterpiece, this cake is perfect for Halloween parties or any spooky gathering. Adorned with drippy red icing that resembles blood and topped with playful eyeball sprinkles and candy bones, it’s sure to be the highlight of your celebration. Whether you serve it as slices on a decorative platter or transform it into cupcakes, this cake promises to impress guests of all ages.
Ingredients
- 2 1/4 cups all purpose flour
- 2 1/2 tsp baking powder
- 1/4 tsp baking soda
- 1/2 tsp salt
- 1/2 cup unsalted butter, room temperature
- 1/2 cup vegetable oil
- 1 1/2 cups sugar
- 1 tbsp vanilla extract
- 4 large eggs
- 1 cup buttermilk
- 5 oz bittersweet chocolate, chopped
- Black gel icing color
- Red gel icing color
- 2 1/4 cups unsalted butter
- 8 cups powdered sugar
- 1 cup natural unsweetened cocoa powder
- 2 tsp vanilla extract
- 5–7 tbsp water/cream
- 1/4 tsp salt
- 4 oz red Wilton candy melts
- 2 tbsp heavy whipping cream
- Sprinkles
Instructions
- Preheat the oven to 350°F (175°C) and grease a bundt pan.
- In one bowl, mix dry ingredients; in another, cream butter, sugar, and eggs. Combine both mixtures alternately with buttermilk.
- Divide the batter, mixing melted chocolate into one half and coloring the other with black gel icing.
- Spoon batters into the pan and swirl gently for a marbled effect.
- Bake for about 20 minutes or until a toothpick comes out clean. Cool before frosting.
- Prepare frosting by beating butter and powdered sugar, then decorate the cooled cake with frosting and candy embellishments.
- Prep Time: 30 minutes
- Cook Time: 20 minutes
- Category: Dessert
- Method: Baking
- Cuisine: American
Nutrition
- Serving Size: 1 slice (100g)
- Calories: 380
- Sugar: 40g
- Sodium: 200mg
- Fat: 18g
- Saturated Fat: 8g
- Unsaturated Fat: 10g
- Trans Fat: 0g
- Carbohydrates: 52g
- Fiber: 2g
- Protein: 4g
- Cholesterol: 70mg
Keywords: For an extra spooky touch, experiment with themed decorations like gummy worms or edible glitter. This recipe can be made ahead of time; just store it in an airtight container for freshness.